
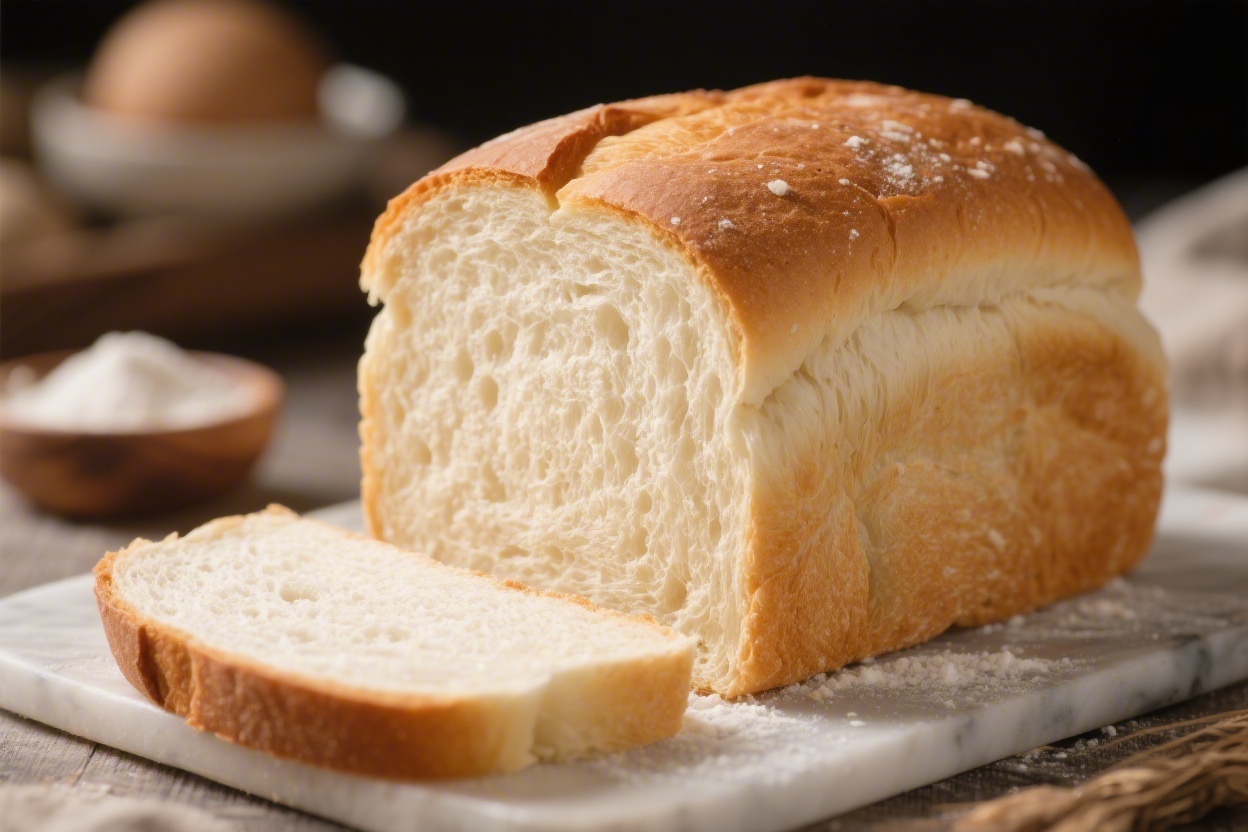
Nothing beats the smell of freshly baked white bread in your kitchen. This classic loaf is soft, slightly sweet, and perfect for sandwiches, toast, or just tearing off a warm piece with butter. You don’t need special tools or fancy ingredients—just a few pantry staples and a bit of patience.
If you’re new to bread making, this is a great place to start. And if you’ve baked before, you’ll love how reliable and flavorful this loaf turns out every time.
What Makes This Recipe So Good
- Beginner-friendly: Straightforward steps and common ingredients make this a low-stress bake.
- Soft yet sturdy texture: The crumb is tender but holds up well to slicing and spreading.
- Balanced flavor: A touch of butter and sugar gives a classic bakery-style taste without being overly sweet.
- Versatile: Shape it into a loaf, rolls, or a braid. It works for sandwiches, toast, and French toast.
- Make-ahead friendly: Dough can be refrigerated overnight to fit your schedule.
Ingredients
- 3 1/2 to 4 cups (420–480 g) bread flour or all-purpose flour, plus extra for dusting
- 1 cup (240 ml) warm water, around 105–110°F (40–43°C)
- 1/2 cup (120 ml) warm milk, around 105–110°F (40–43°C)
- 2 1/4 teaspoons (7 g) active dry yeast or instant yeast (one packet)
- 2 tablespoons (25 g) granulated sugar or honey
- 2 tablespoons (28 g) unsalted butter, softened (plus more for greasing and brushing)
- 1 1/2 teaspoons fine salt
- Optional: 1 egg for an egg wash (1 egg beaten with 1 tablespoon water) for a shinier crust
Step-by-Step Instructions
- Activate the yeast (if using active dry): In a bowl, combine warm water, warm milk, and sugar.Sprinkle the yeast over the top. Let it sit for 5–10 minutes until foamy. If using instant yeast, you can skip proofing and mix it directly with the flour.
- Mix the dough: In a large mixing bowl, add 3 1/2 cups flour and salt.Pour in the yeast mixture and add the softened butter. Stir with a wooden spoon or use a stand mixer with a dough hook until a shaggy dough forms.
- Knead to develop gluten: Knead by hand on a lightly floured surface or in the mixer on medium-low speed for 7–10 minutes. Add small sprinkles of flour only if the dough is sticking badly.You’re aiming for a smooth, slightly tacky dough that springs back when pressed.
- First rise: Shape the dough into a ball and place it in a lightly greased bowl. Cover with a clean towel or plastic wrap. Let it rise in a warm, draft-free spot until doubled, about 60–90 minutes.A finger pressed gently into the dough should leave a slow-filling dent.
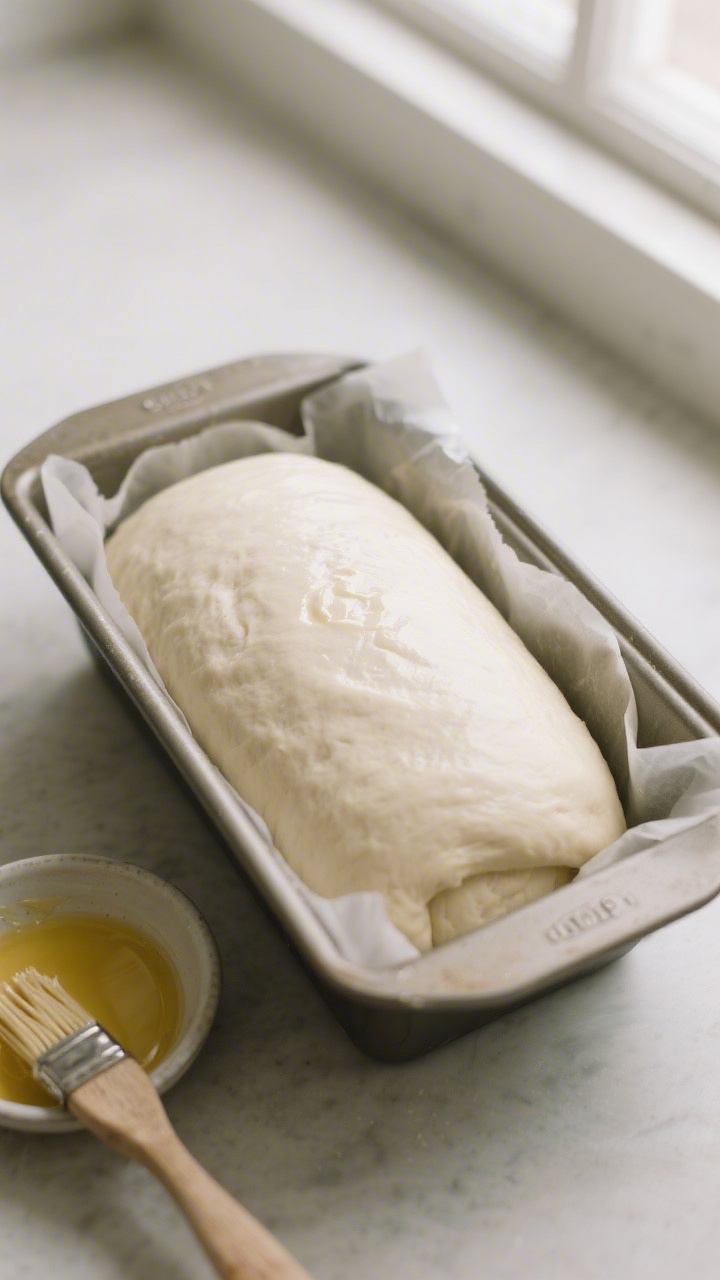
- Prepare the pan: Grease a 9×5-inch (23×13 cm) loaf pan with butter or nonstick spray. You can also line it with a parchment sling for easy removal.
- Shape the loaf: Turn the dough onto a lightly floured surface and gently deflate it. Pat into a rectangle about 8×12 inches.Roll it up tightly from the short end, pinch the seam closed, and tuck the ends under. Place seam-side down in the prepared pan.
- Second rise: Cover and let the dough rise until it crowns about 1 inch above the rim of the pan, 45–60 minutes. It should feel airy but still spring back slowly when tapped.
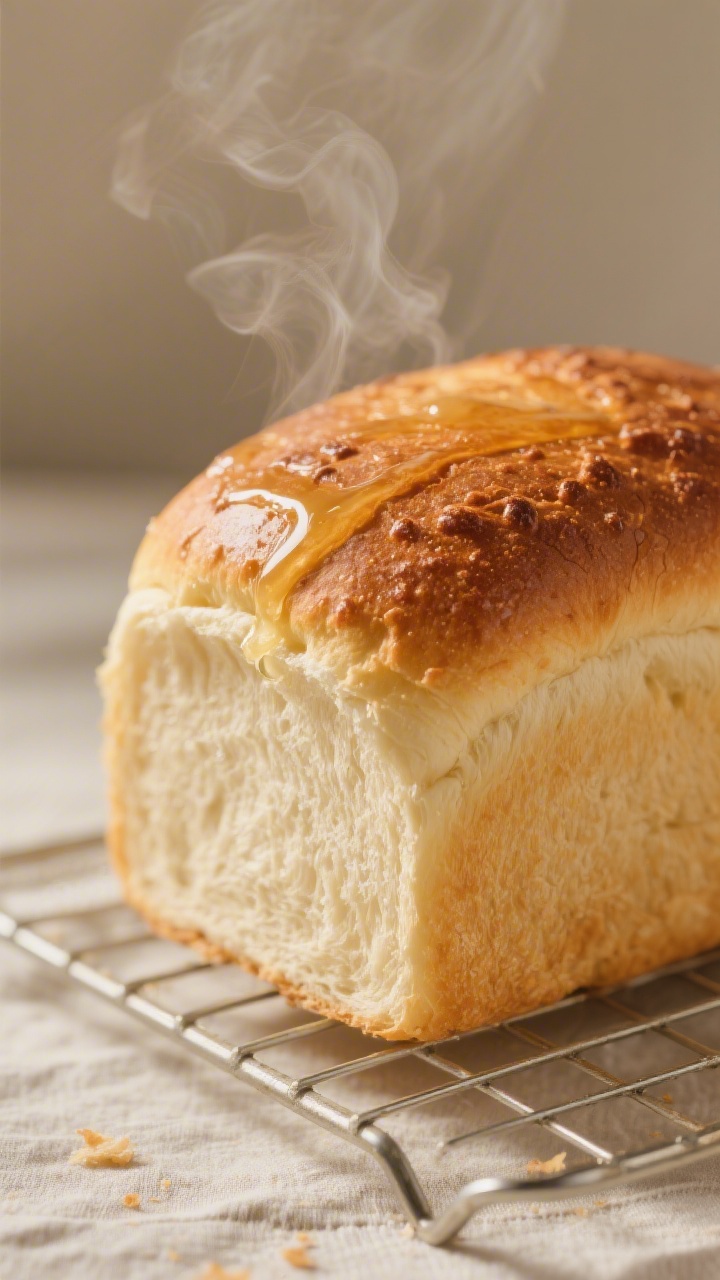
- Preheat and glaze: Preheat the oven to 350°F (175°C).For a soft, golden top, brush the loaf with melted butter. For a shinier, more defined crust, brush gently with egg wash.
- Bake: Bake for 28–35 minutes, until the top is deep golden and the loaf sounds hollow when tapped. An instant-read thermometer inserted into the center should read about 190–195°F (88–90°C).
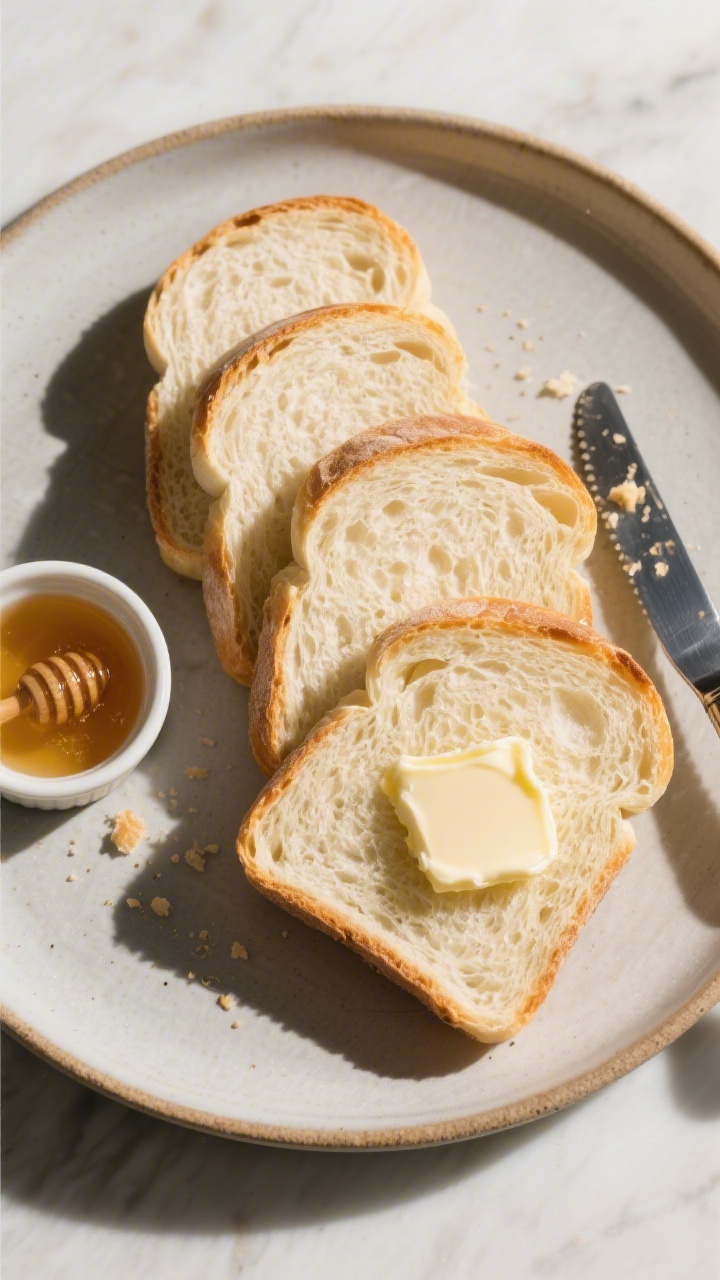
- Cool properly: Remove from the pan after 10 minutes and cool on a wire rack.Brush the top with a little more butter for a soft crust. Let it cool at least 45 minutes before slicing to avoid squashing the crumb.
Storage Instructions
- Room temperature: Store the cooled loaf in a bread box or wrapped in a clean towel for up to 3 days. Avoid the fridge—it dries bread out.
- Freezer: Slice, then freeze in a zip-top bag for up to 3 months.Pull out slices as needed and toast straight from frozen.
- Refresh: If the crust softens or the bread feels stale, warm slices in a 300°F (150°C) oven for 5–8 minutes to revive texture.
Health Benefits
- Simple ingredients: Homemade bread skips the preservatives and additives often found in store-bought loaves.
- Portion control: Slicing your own bread makes it easier to choose thinner or thicker pieces based on your needs.
- Customization: You can swap in part whole wheat flour or add seeds for extra fiber and nutrients.
- Less sodium and sugar: You control how much goes in, keeping it moderate and balanced.
Pitfalls to Watch Out For
- Water too hot: If your liquid is above 115°F (46°C), it can kill the yeast and prevent rising.
- Too much flour: Over-flouring during kneading leads to a dense loaf. The dough should be slightly tacky, not dry.
- Under-kneading or over-kneading: Under-kneaded dough tears easily and won’t rise as well. Over-kneading in a mixer can make it tough.Aim for smooth, elastic dough that passes a gentle windowpane test.
- Skipping the cool time: Slicing too soon compresses the crumb and makes it gummy. Let it cool so the structure sets.
- Over-proofing: If the dough rises far above the pan and then collapses, it’s over-proofed. Bake when it’s about 1 inch over the rim and still springy.
Recipe Variations
- Honey White Bread: Swap sugar for honey and add an extra tablespoon for a lightly sweet, aromatic loaf.
- Milk Bread-Style: Replace the water with milk for an ultra-soft crumb.Brush generously with butter after baking.
- Garlic and Herb Loaf: Knead in 1–2 teaspoons dried Italian herbs and 2 cloves minced garlic for a savory twist.
- Half Whole Wheat: Use 2 cups white flour and 1 1/2 cups whole wheat. Add 1 extra tablespoon of water if the dough feels stiff.
- Seeded Top: After egg wash, sprinkle sesame, poppy, or everything seasoning for crunch and flavor.
- Dinner Rolls: Divide dough into 12 pieces, shape into balls, place in a greased 9×13 pan, and bake 18–22 minutes.
FAQ
Can I use instant yeast instead of active dry yeast?
Yes. Use the same amount and mix it directly with the dry ingredients.
Skip the proofing step and proceed with the recipe as written.
How do I know when I’ve kneaded enough?
The dough should feel smooth, elastic, and slightly tacky. If you stretch a small piece gently, it should thin out without tearing right away (the windowpane test). In a mixer, 7–10 minutes on low to medium-low is typical.
Why did my bread come out dense?
Common causes are adding too much flour, not kneading long enough, or not letting the dough rise fully.
Also check yeast freshness and liquid temperature. Dough that’s tight or cold rises more slowly.
Can I make the dough ahead of time?
Absolutely. After the first rise, punch down the dough, cover tightly, and refrigerate for up to 24 hours.
Bring it to room temperature, shape, and let it rise in the pan before baking.
What’s the best way to slice the loaf?
Let it cool completely and use a sharp serrated knife. For very even slices, turn the loaf on its side and cut gently with a sawing motion.
Can I bake this without a loaf pan?
Yes. Shape it into a batard (oval) and place on a parchment-lined sheet.
It may spread a bit more, but it will still taste great. Start checking for doneness around 25 minutes.
How can I get a softer crust?
Brush the crust with melted butter right after baking and cover loosely with a towel while it cools. Using milk in the dough also softens the crust.
What if I don’t have a thermometer?
Look for a deep golden top and a hollow sound when you tap the bottom.
The loaf should feel lighter than it looks and pull slightly from the sides of the pan.
Wrapping Up
This white bread recipe is simple, reliable, and endlessly useful. With a little kneading and a couple of rises, you’ll have a warm, soft loaf that tastes far better than store-bought. Once you’ve made it once or twice, feel free to play with add-ins and shapes.
Keep the core method the same, and you’ll have bakery-quality bread whenever you want it. Enjoy a slice warm with butter, or save it for the perfect sandwich tomorrow.
Printable Recipe Card
Want just the essential recipe details without scrolling through the article? Get our printable recipe card with just the ingredients and instructions.