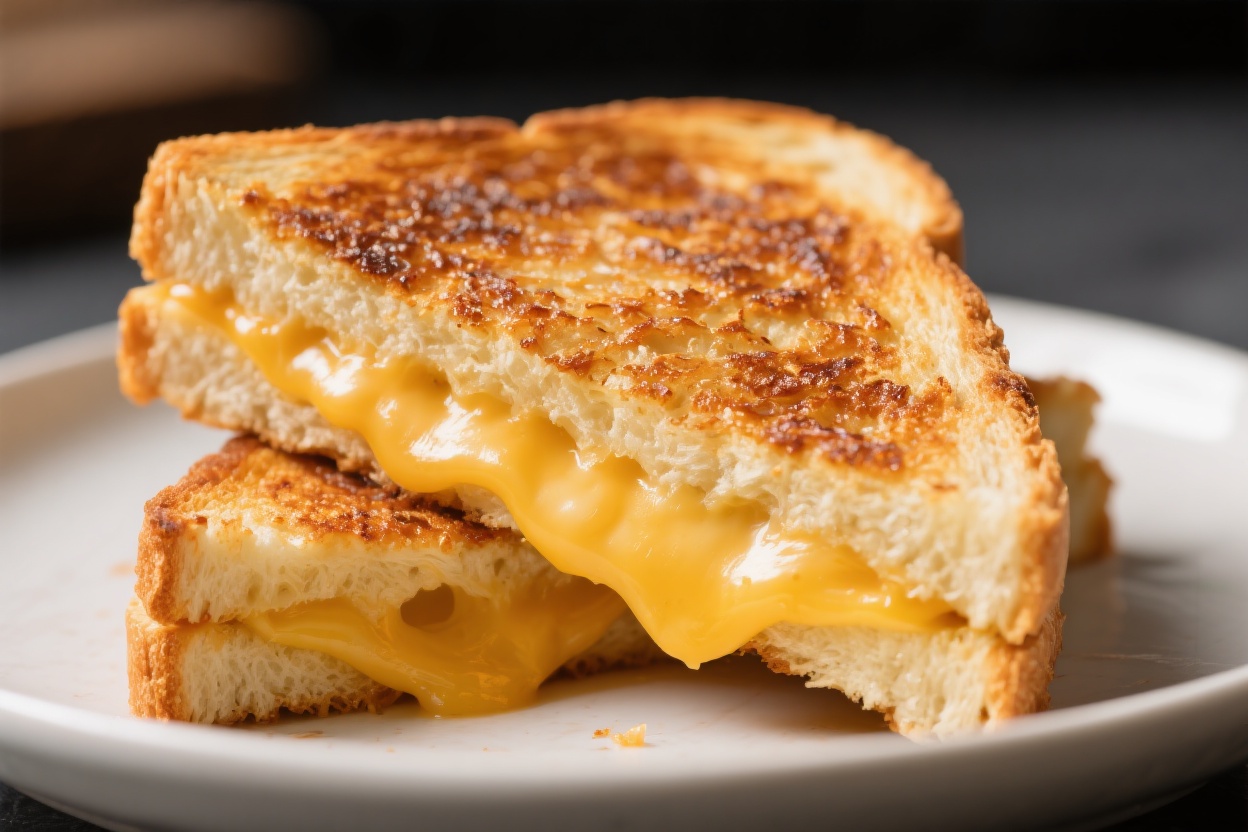
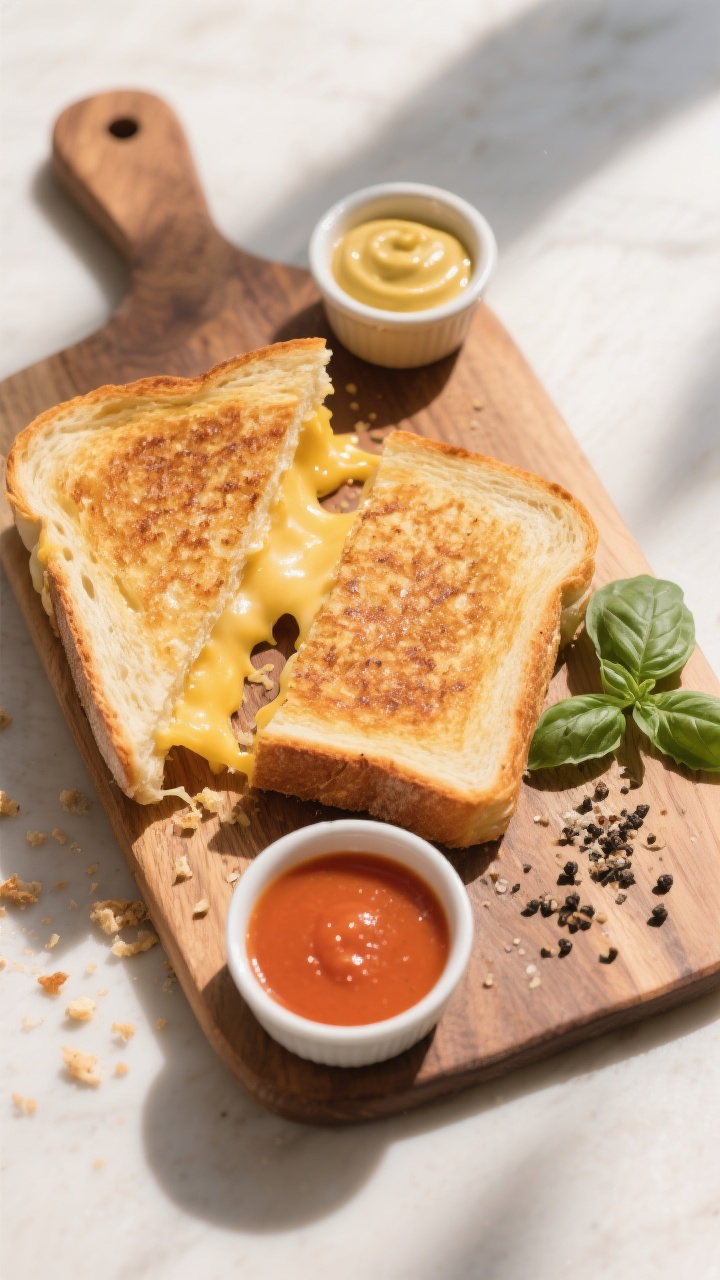
There’s something incredibly comforting about a grilled cheese sandwich done right. Golden edges, a buttery crunch, and a gooey center—this is simple food that never loses its charm. Whether you’re feeding kids, nursing a craving, or pairing it with tomato soup, it delivers every time.
With a few small tweaks, you can turn a basic grilled cheese into a mini masterpiece. Let’s make one that hits all the right notes—crispy, cheesy, and consistently perfect.
What Makes This Special
This grilled cheese balances texture and flavor in a way that feels restaurant-level but takes just minutes. The outside is crispy and evenly browned, thanks to a gentle, steady heat and the right fat.
The inside is melty and stretchy, with a blend of cheeses that gives both pull and flavor. It’s adaptable too—switch up the bread, add-ins, or cheese combo without losing the core magic. And you don’t need special equipment—just a skillet and a spatula.
Shopping List
- Bread: Sourdough, country white, or brioche (2 slices per sandwich)
- Cheese: A meltable blend like sharp cheddar + low-moisture mozzarella, or American, Gruyère, fontina, or Monterey Jack (about 2–3 ounces per sandwich)
- Fat for the pan: Unsalted butter, mayonnaise, or a mix of both
- Optional seasonings: Pinch of salt, black pepper, garlic powder, or a dash of hot sauce
- Optional add-ins: Thin tomato slices (patted dry), caramelized onions, crispy bacon, thin ham, jalapeños, or a swipe of pesto
How to Make It
- Choose the right bread. Aim for slices about 1/2 inch thick.Too thin burns easily; too thick prevents the cheese from melting. Sourdough and country white are classics for a reason: they toast well and hold their shape.
- Pick a cheese combo. For ideal melt and flavor, use a blend. Try 2 parts cheddar for taste and 1 part mozzarella for stretch.If you want effortless melt, American cheese works beautifully.
- Prep the bread with fat. Spread a thin, even layer of softened butter or mayonnaise on the outsides of both bread slices. Butter gives a rich flavor; mayo browns evenly and resists burning. A 50/50 mix is a great hack.
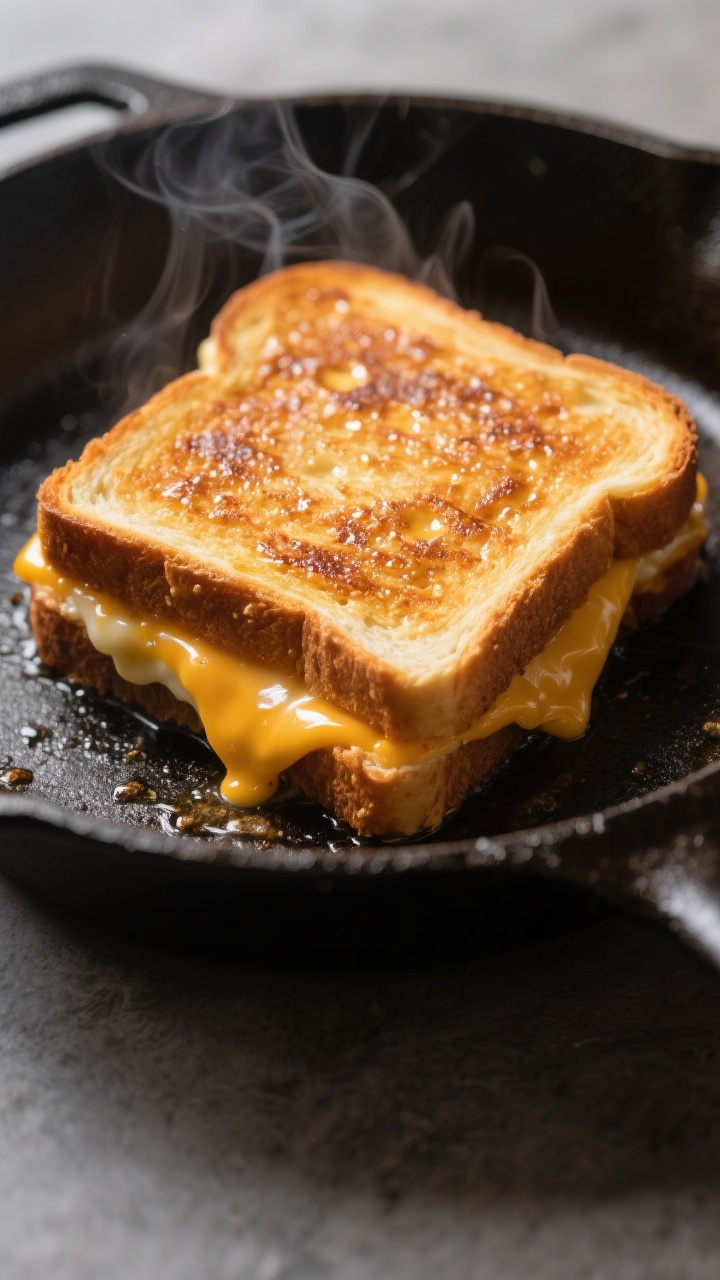
- Heat the pan low and slow. Preheat a nonstick or cast-iron skillet over medium-low heat for 2–3 minutes.Too hot and the bread will scorch before the cheese melts.
- Assemble in the pan. Place one slice, buttered side down, in the skillet. Add the cheese evenly, reaching the edges for that gooey seal. Top with the second slice, buttered side up.Press gently with a spatula.
- Toast the first side. Cook for 3–4 minutes, or until the bottom is deeply golden. If it’s browning too fast, lower the heat. If using add-ins (like tomato or ham), keep them thin and dry.
- Flip and finish. Turn the sandwich carefully.Cook another 3–4 minutes, pressing lightly with the spatula to encourage even browning and melting. For extra insurance, cover the pan for the last minute to trap heat.
- Check meltiness. If the bread is perfect but the cheese needs more time, lower the heat and cook 1–2 minutes more. You can also add a teaspoon of water to the pan and cover briefly to steam the center.
- Rest and slice. Transfer to a cutting board and rest 1 minute so the cheese settles slightly.Slice diagonally for classic vibes and serve immediately.
Storage Instructions
Grilled cheese is best fresh, but you can still plan ahead. Store any leftovers in an airtight container in the fridge for up to 2 days. Reheat in a skillet over medium heat with a tiny bit of butter for 3–4 minutes per side until crisp and hot.
Avoid the microwave—it turns the bread soggy. If you want to prep ahead, assemble the sandwich (un-toasted) and chill it, then cook to order.
Benefits of This Recipe
- Foolproof technique: The medium-low heat method keeps the bread golden and the cheese melty.
- Customizable: Works with many breads and cheeses, plus easy add-ins.
- Fast and satisfying: From pan to plate in under 10 minutes.
- Budget-friendly: Uses simple ingredients you likely have on hand.
- Kid- and adult-approved: Comforting, nostalgic, and endlessly riffable.
Pitfalls to Watch Out For
- Heat too high: The bread burns before the cheese melts. Keep it medium-low and be patient.
- Too much filling: Overstuffing slows melting and causes slippage.Stick to 2–3 ounces of cheese and thin add-ins.
- Wet ingredients: Tomatoes or pickles can make the bread soggy. Pat them dry or add a thin cheese layer on both sides to create a barrier.
- Cold pan: Starting on a cold pan leads to uneven browning. Preheat first for consistency.
- Uneven slices: Very thick or uneven bread will brown inconsistently.Aim for uniform slices.
Variations You Can Try
- Classic Diner: White bread + American cheese + butter. Simple and perfect.
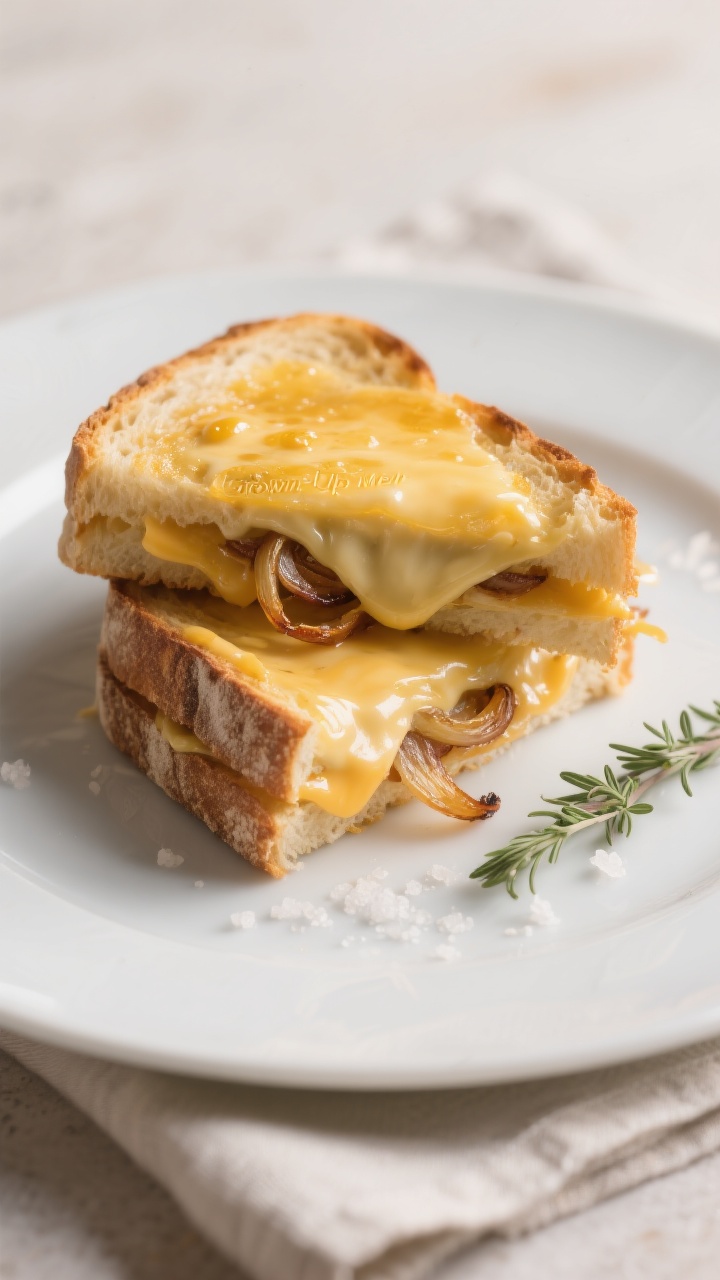
- Grown-Up Melt:</-strong> Sourdough + sharp cheddar + Gruyère + a smear of Dijon.
- Tomato Basil: Mozzarella + thin tomato slices (patted dry) + fresh basil or a swipe of pesto.
- Smoky Bacon Cheddar: Cheddar + crispy bacon + a pinch of black pepper.
- Spicy Kick: Pepper Jack + jalapeños + a few drops of hot sauce.
- Onion Jam: Fontina + caramelized onions + a touch of thyme.
- Garlic Toast Style: Mix softened butter with garlic powder and parsley for the outside spread.
- Gluten-Free: Use your favorite gluten-free bread; watch heat, as some GF breads brown faster.
FAQ
What’s the best cheese for a grilled cheese?
Use a blend for both flavor and melt. Sharp cheddar adds bite, and mozzarella or American adds stretch.
Gruyère, fontina, and Monterey Jack are also great options.
Butter or mayonnaise on the outside?
Both work. Butter tastes rich and classic, while mayo browns evenly and is more forgiving on heat. A 50/50 mix gives you the best of both.
How do I keep the bread from burning?
Cook on medium-low heat and preheat the pan.
If it’s browning too quickly, lower the heat and give it more time so the cheese can melt fully.
Can I make it without a nonstick pan?
Yes. Cast iron is excellent for even browning. Just make sure the pan is well preheated and the bread is well coated with butter or mayo to prevent sticking.
How much cheese should I use?
About 2–3 ounces per sandwich, depending on bread size.
Enough to cover the slice edge to edge without piling too high.
What’s the trick to extra melty cheese?
Grate the cheese instead of slicing so it melts faster. You can also cover the pan for the last minute to trap heat, or add a teaspoon of water to create light steam.
Can I add protein or veggies?
Absolutely. Keep add-ins thin and dry: ham, bacon, tomato, spinach, or caramelized onions work well.
Too much moisture or bulk can make the sandwich soggy or hard to melt through.
Is there a way to make it lighter?
Use a thinner layer of cheese, a light spread of fat, and whole grain bread. You can also cook with a nonstick spray, though flavor and browning will be less rich.
How do I reheat leftovers?
Reheat in a skillet over medium heat with a tiny dab of butter for 3–4 minutes per side. This revives the crisp exterior far better than the microwave.
What soup pairs best with grilled cheese?
Tomato soup is classic, but creamy potato, roasted red pepper, or butternut squash soup also pair beautifully.
Wrapping Up
A great grilled cheese is all about balance: gentle heat, good bread, and a cheese combo that melts like a dream.
With these simple steps, you’ll get a sandwich that’s crispy on the outside and perfectly gooey inside—every single time. Keep it classic or play with variations depending on your mood. Either way, it’s comfort you can count on in under 10 minutes.
Printable Recipe Card
Want just the essential recipe details without scrolling through the article? Get our printable recipe card with just the ingredients and instructions.