
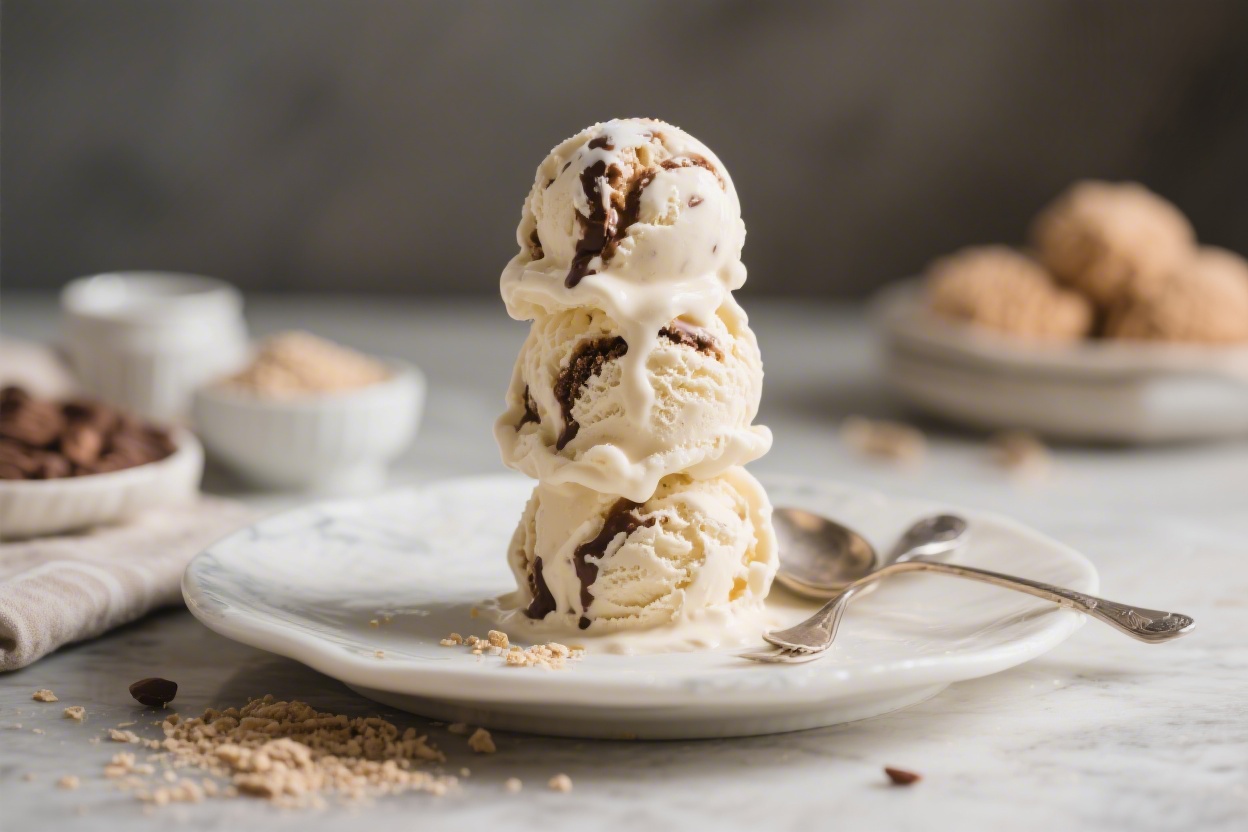
Craving ice cream but want something that actually supports your goals? This homemade high-protein ice cream hits the spot without the sugar crash. It’s creamy, easy to customize, and comes together with just a few simple ingredients.
You don’t need fancy equipment, and you can make it fit your taste and macros. Whether you’re after a post-workout dessert or a weeknight sweet fix, this recipe delivers.
Why This Recipe Works
This version uses a smart mix of protein powder, Greek yogurt, and a milk base to create a creamy texture that doesn’t turn icy. The protein adds body and richness, while a little sweetener keeps the flavor balanced without piling on calories.
A small amount of fat from yogurt or nut butter helps prevent that chalky protein taste. With the right blending and a couple of texture boosters, you get scoopable, soft-serve style results—no ice cream maker required.
Ingredients
- 1 scoop (25–30 g) vanilla or chocolate whey or casein protein powder (plant-based works too, but see notes below)
- 1 cup (240 ml) unsweetened milk (dairy milk for creamier results; almond or oat milk for lighter versions)
- 1/2 cup (120 g) plain Greek yogurt (2% or whole milk for best texture)
- 1–2 tablespoons sweetener (maple syrup, honey, sugar, or a zero-calorie sweetener of your choice)
- 1/2 teaspoon vanilla extract (optional but boosts flavor)
- Pinch of salt (enhances sweetness)
- 1–2 teaspoons nut butter or 1 teaspoon coconut oil (optional, helps reduce iciness)
- 1/2 teaspoon xanthan gum or guar gum (optional, for creamier texture)
- Add-ins (optional): mini chocolate chips, cocoa powder, frozen berries, crushed cookies, or chopped nuts
Step-by-Step Instructions
- Prep your base: In a blender, add the milk, Greek yogurt, sweetener, vanilla extract, and a pinch of salt. If using nut butter/coconut oil and xanthan or guar gum, add them now.
- Add protein powder: Sprinkle the protein powder on top of the liquid.This helps it blend smoothly without clumping.
- Blend until silky: Blend on medium-high for 20–30 seconds. Scrape the sides if needed. The mixture should be smooth, slightly thick, and free of lumps.
- Taste and adjust: Check sweetness and flavor.Add a bit more sweetener, vanilla, or a spoon of cocoa if you want a deeper chocolate profile.
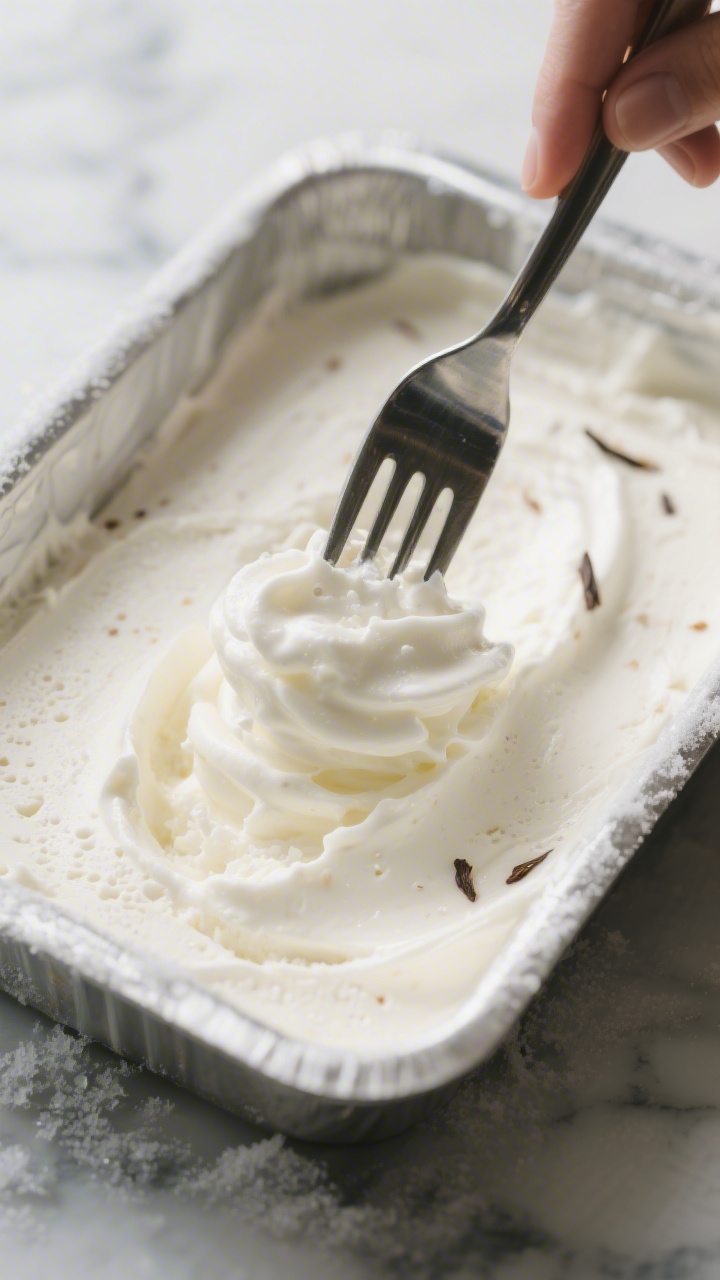
- Freeze method A (soft-serve fast): Pour into a shallow, freezer-safe container. Freeze for 60–90 minutes, stirring with a fork every 20–30 minutes to break up ice crystals. Serve when it reaches soft-serve texture.
- Freeze method B (firmer scoops): Freeze 2–3 hours, stirring twice.Before serving, let the container sit at room temp for 10–15 minutes to soften for scoopable texture.
- Optional ice cream maker: Chill the blended base for 2 hours, then churn according to your machine’s instructions for the creamiest result.
- Finish with add-ins: Fold in chocolate chips, berries, or nuts during the last stir or in the final minute of churning to keep them evenly distributed.
Storage Instructions
- Short-term: Keep in a sealed, shallow container in the freezer for up to 5 days.
- Prevent freezer burn: Press a piece of parchment directly onto the surface before sealing the lid.
- Soften before serving: Let it sit on the counter 10–20 minutes, or microwave in 10-second bursts until scoopable.
- Re-blend fix: If it becomes too icy after a few days, let it thaw slightly and re-blend, then refreeze for 30–60 minutes.
Why This is Good for You
- High in protein: Each serving can pack 20–30 grams of protein, supporting muscle recovery and keeping you fuller longer.
- Lower in sugar: You control the sweetener, so you can keep it light without sacrificing taste.
- Balanced macros: A bit of fat and carbs paired with protein makes it a steady-energy dessert instead of a blood sugar spike.
- Customizable: Choose dairy or plant-based options to suit your preferences or dietary needs.
Pitfalls to Watch Out For
- Grainy texture: Overusing protein powder or skipping enough liquid can make it chalky. Stick to one scoop per cup of liquid and blend well.
- Excess iciness: Very low-fat bases freeze hard. Add a small amount of fat (yogurt, nut butter, or coconut oil) and consider xanthan/guar gum.
- Too sweet or not sweet enough: Cold dulls sweetness.Taste the base before freezing and make it slightly sweeter than you think you need.
- Clumping with plant proteins: Some plant powders clump. Blend longer, add powder last, or sift it in to reduce lumps.
- Rock-solid after freezing: Use a shallow container, stir during freezing, and let it sit out before serving. A splash of vodka (1 teaspoon) can also improve scoopability.
Variations You Can Try
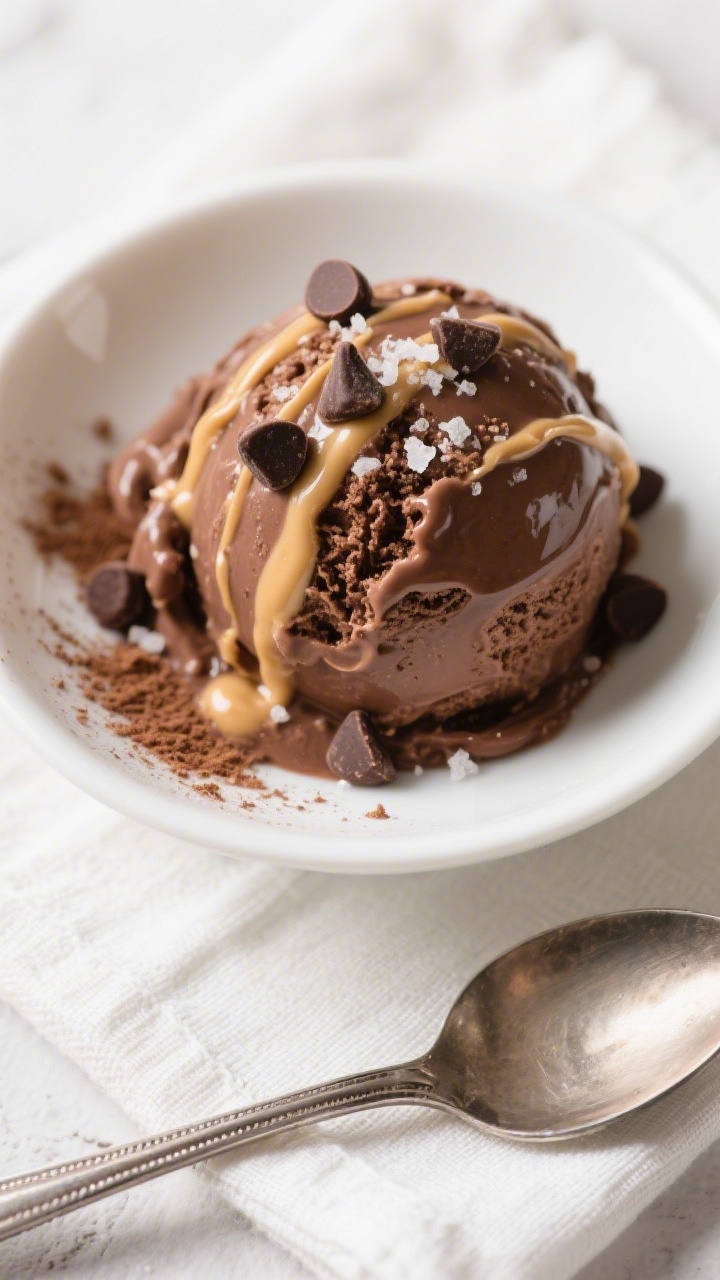
- Chocolate Peanut Butter: Add 1 tablespoon cocoa powder and 1 tablespoon peanut butter.Use chocolate protein for a double hit.
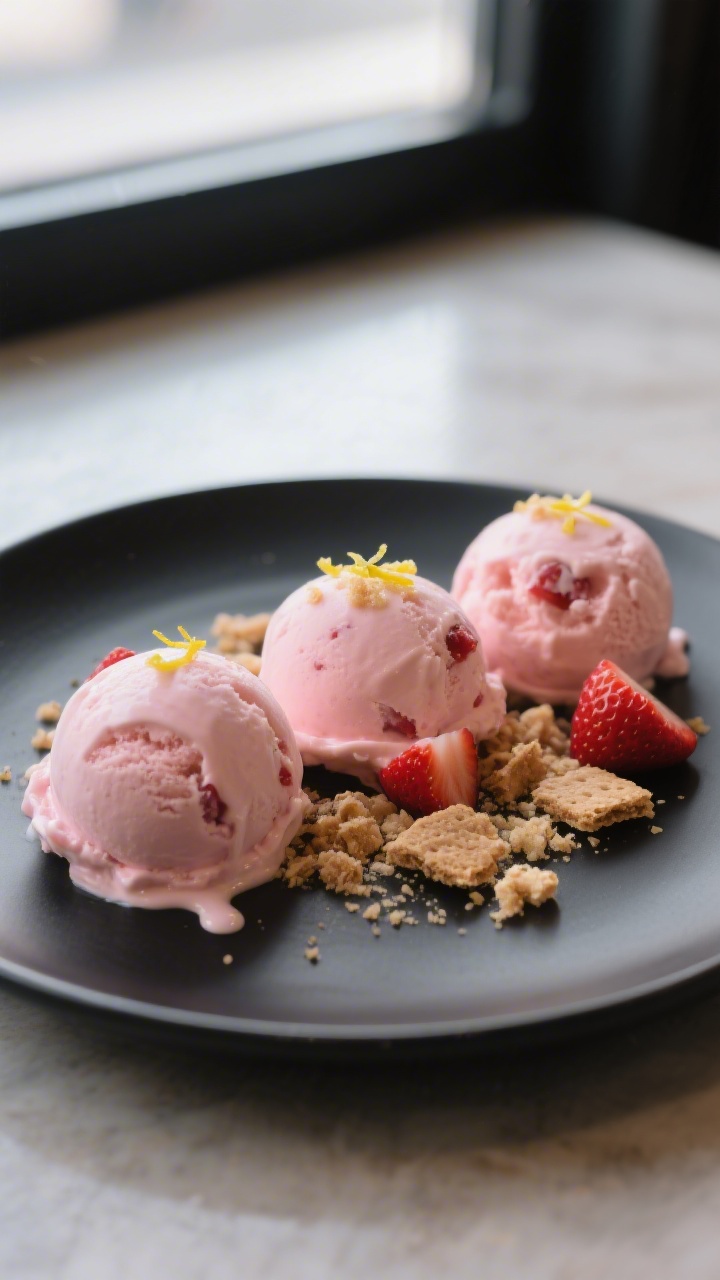
- Strawberry Cheesecake: Blend in 1/2 cup frozen strawberries and 1–2 tablespoons cream cheese. Add a few crushed graham crackers at the end.
- Mint Chocolate Chip: Add 1/4 teaspoon peppermint extract and a drop of green food coloring (optional). Fold in mini chocolate chips.
- Mocha Swirl: Mix 1 teaspoon instant espresso into the base.Swirl in 1 tablespoon melted dark chocolate during the last stir.
- Banana Bread: Blend in half a ripe banana, a pinch of cinnamon, and a few walnut pieces at the end.
- Vegan Vanilla: Use plant milk, coconut yogurt, and a plant-based protein. Add 1 teaspoon coconut oil for creaminess.
FAQ
Can I use only protein powder and water?
Using just protein powder and water will freeze into an icy block. You need some fat (from yogurt, dairy milk, or a small amount of oil) and ideally a texture booster like xanthan or guar gum for creaminess.
Which protein powder works best?
Whey or a whey–casein blend creates the smoothest texture.
Casein alone is thicker and creamy. Plant proteins can work, but blend longer and consider a bit more sweetener and fat to offset any earthiness.
Do I need an ice cream maker?
No. Stirring during freezing in a shallow container works well.
An ice cream maker simply aerates the base more, making it extra creamy, but it’s optional.
How do I reduce calories further?
Use nonfat Greek yogurt, unsweetened almond milk, and a zero-calorie sweetener. Keep a small amount of fat (like 1 teaspoon coconut oil) to avoid a hard, icy texture.
Can I add mix-ins like cookies or nuts?
Yes. Fold them in at the end of freezing or during the last minute of churning so they don’t sink or turn soggy.
Keep portions modest to maintain macros.
Why is my ice cream hard after a day in the freezer?
Low sugar and low fat make mixtures freeze firm. Let it thaw briefly on the counter before scooping, use a shallow container, and consider adding a teaspoon of vodka or a bit more fat to improve softness.
Is there a lactose-free option?
Use lactose-free milk and lactose-free Greek yogurt, or go fully plant-based with coconut yogurt and almond milk. Choose a lactose-free or plant-based protein powder.
How much protein is in a serving?
It varies by your powder and portion size, but most batches deliver around 20–30 grams of protein per serving when using one standard scoop and Greek yogurt.
In Conclusion
Homemade high-protein ice cream is an easy win: fast to make, customizable, and truly satisfying.
With the right base, a little fat, and a quick stir during freezing, you get creamy scoops without the sugar overload. Keep a batch in the freezer for weeknight cravings, post-workout treats, or a better-for-you dessert that still tastes like dessert. Once you try it, you’ll wonder why you ever bought the store-bought stuff.
Printable Recipe Card
Want just the essential recipe details without scrolling through the article? Get our printable recipe card with just the ingredients and instructions.