Sourdough bread feels special, but it doesn’t have to be complicated. With a lively starter and a little patience, you can bake a loaf that’s crisp on the outside, tender inside, and full of character. This guide keeps things straightforward, so you know exactly what to do at each step.
You’ll learn a reliable base recipe and smart variations, plus the little tips that make a big difference. If you’ve ever wanted bakery-style bread at home, this is your starting line.
What Makes This Recipe So Good
- Simple ingredients, big flavor: Flour, water, salt, and starter come together to create a loaf with a deep, tangy taste and a beautiful crust.
- Flexible timing: The dough works with your schedule. Long, slow fermentation builds flavor without constant attention.
- Reliable structure: Clear steps for mixing, folding, and shaping help you get good rise and an open crumb, even if you’re new to sourdough.
- Versatile base: Start here, then add seeds, herbs, whole grains, or swap methods to suit your kitchen and taste.
- Home-oven friendly: Uses a Dutch oven or a simple tray of steam to mimic bakery conditions.
Ingredients
- Active sourdough starter: 100 g (fed and bubbly)
- Warm water: 350 g (about 80–85°F / 27–29°C)
- Bread flour: 450 g (you can sub up to 100 g with whole wheat)
- Salt: 10 g (about 1 3/4 teaspoons fine sea salt)
- Optional add-ins: 1–2 tablespoons olive oil, 1–2 tablespoons honey, or 50–80 g seeds (sunflower, pumpkin, sesame)
- Rice flour or extra bread flour: For dusting the banneton or towel
Step-by-Step Instructions
- Check your starter: Make sure it’s at peak activity—bubbly, doubled after feeding, and passes the float test (a small spoonful floats in water).A strong starter is key to a good rise.
- Mix the leaven: In a bowl, whisk 100 g starter with 350 g warm water until cloudy. Add 450 g bread flour and stir until no dry bits remain. The dough will look shaggy.Rest for 20–30 minutes (this is the autolyse).
- Add salt: Sprinkle 10 g salt over the dough. With wet hands, pinch and fold the dough a few times to incorporate. If adding oil or honey, work it in now.The dough should feel soft and slightly tacky.
- Begin bulk fermentation: Cover the bowl and let it rest at room temperature (70–75°F / 21–24°C) for 3–5 hours. During the first 90 minutes, perform 3–4 sets of stretch-and-folds every 30 minutes. To do this, grab a corner of the dough, stretch it up gently, and fold it over itself.Rotate and repeat 3–4 times per set.
- Watch the dough, not the clock: By the end of bulk fermentation, the dough should be smoother, puffed by about 50%, and show small bubbles. If your kitchen is cool, it may take longer. If warm, it may go faster.
- Pre-shape: Lightly flour your counter.Gently tip the dough out. Using a bench scraper, fold edges toward the center to form a loose round. Rest 15–20 minutes, uncovered, to relax the gluten.
- Final shape: For a round loaf (boule), flip the dough seam-side up.Stretch the bottom up and over, then the sides to the center, and roll down to create surface tension. For an oval (batard), shape into a log using similar folds. Aim for a taut surface.
- Prepare the basket: Dust a banneton generously with rice flour, or line a bowl with a floured kitchen towel.Place the dough seam-side up in the basket.
- Proof: You have two options:
- Room-temperature proof: 45–90 minutes, until slightly puffy and springs back slowly when pressed.
- Cold proof: Cover and refrigerate 8–16 hours. This is easiest for timing and boosts flavor and scoring.
- Preheat the oven: Place a Dutch oven with lid inside and preheat to 475°F (245°C) for at least 30 minutes. If you don’t have a Dutch oven, place a baking stone or sheet in the oven and a metal tray on the lower rack for steam.
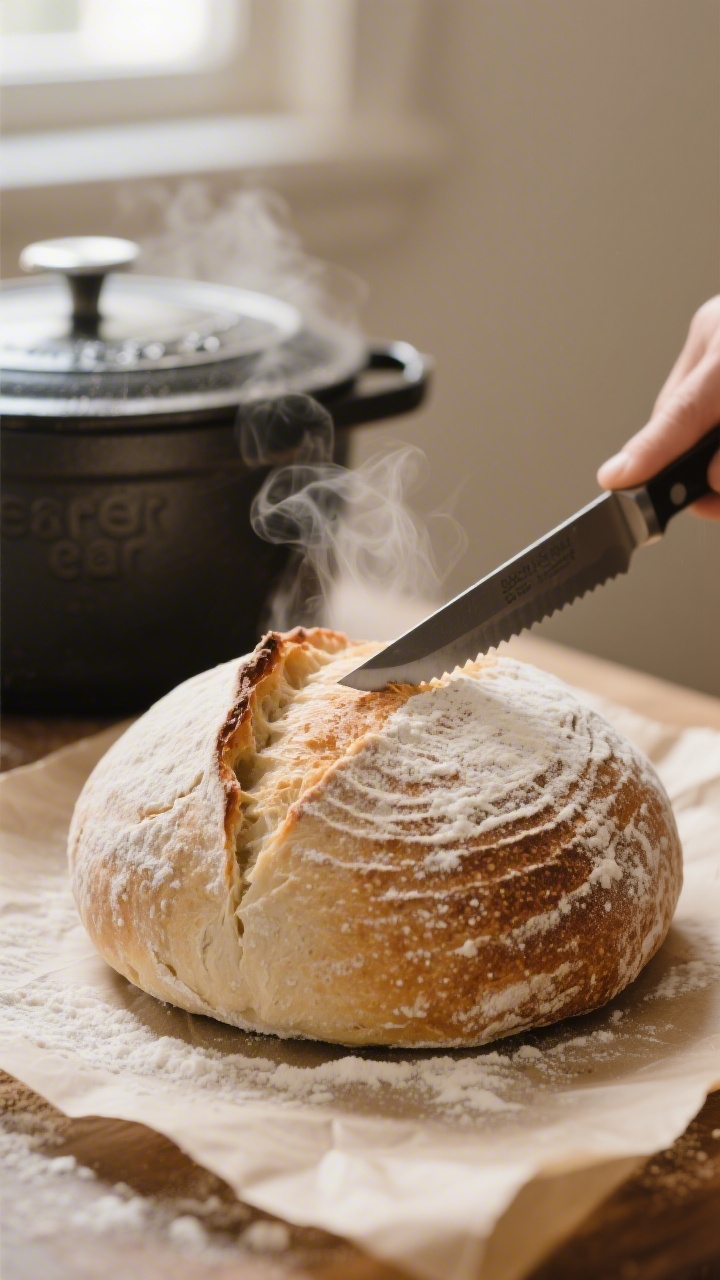
- Score: Turn the dough onto a piece of parchment so the seam is down.Dust lightly with flour. Using a sharp lame or knife, score a 1/2-inch deep slash along the top to control expansion.
- Bake with steam: Carefully transfer the dough to the hot Dutch oven. Cover and bake for 20 minutes.Remove the lid, reduce heat to 450°F (232°C), and bake 20–25 minutes more, until deep golden brown. If using a stone, slide the loaf onto it and pour a cup of hot water into the lower tray, then close the door quickly. Vent after 15–20 minutes and continue baking.
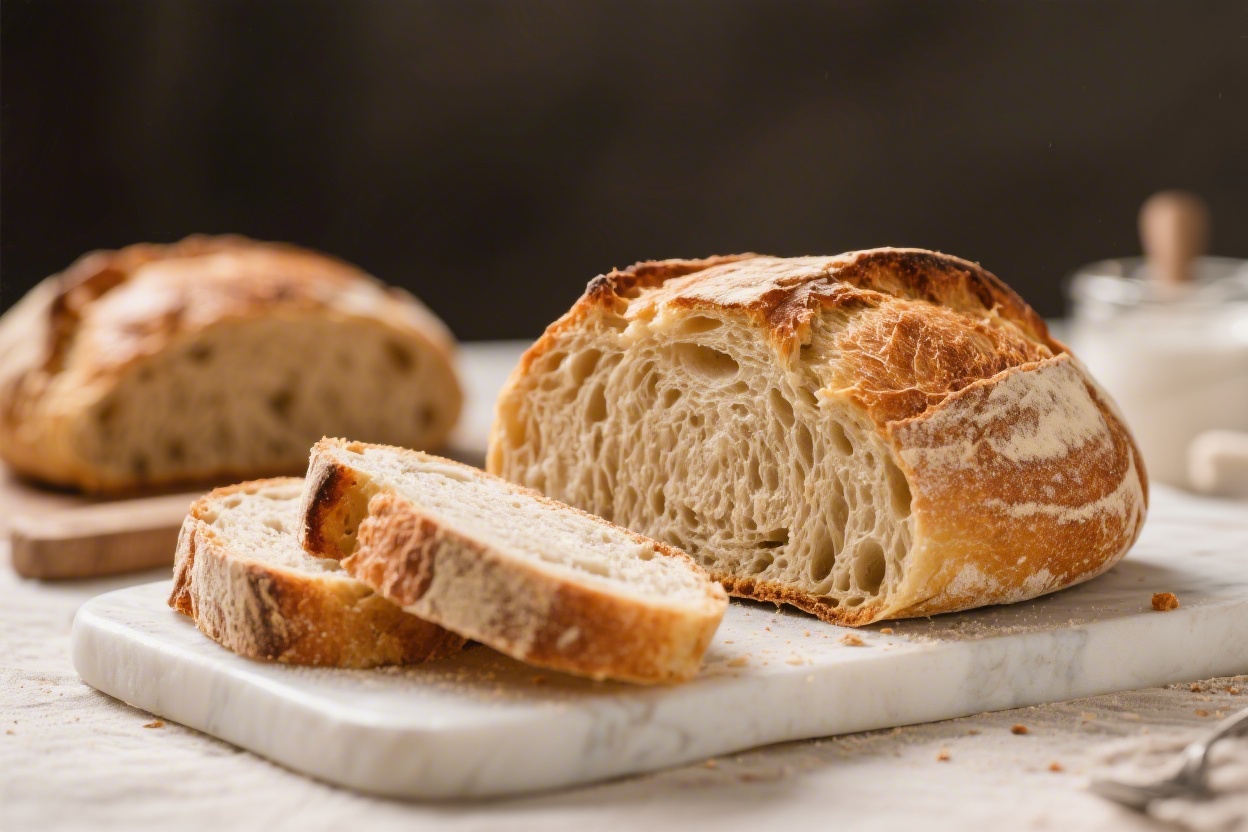
- Check doneness: The crust should be richly colored and the loaf should sound hollow when tapped.Internal temperature should be around 208–212°F (98–100°C).
- Cool completely: Transfer to a wire rack and let it cool at least 1 hour before slicing. This sets the crumb and keeps it moist.
Keeping It Fresh
- Short term: Store at room temperature, cut side down on a board or wrapped in a clean towel, for up to 2 days. Avoid plastic—it softens the crust.
- Medium term: Use a paper bag inside a bread box to balance moisture and crunch.
- Long term: Slice, wrap tightly, and freeze for up to 2 months.Toast straight from the freezer for best texture.
- Refresh the crust: If it softens, reheat the loaf at 350°F (175°C) for 8–10 minutes to crisp it back up.

Benefits of This Recipe
- Better digestibility: Long fermentation can make bread easier on the stomach for some people.
- Natural leavening: No commercial yeast needed, just a healthy starter.
- Great keeping quality: Sourdough resists staling and mold a bit longer than regular bread.
- Customizable flavor: Adjust fermentation time for mild or tangier notes.
- Skill-building: Teaches techniques—like shaping and scoring—that carry over to all bread baking.
What Not to Do
- Don’t rush the starter: Using an underfed or sluggish starter leads to dense loaves.
- Don’t add too much flour during shaping: Extra flour tightens the dough and blocks proper rise.
- Don’t proof blindly by time: Temperature matters. Use visual cues like puffiness and the finger dent test.
- Don’t skip the preheat: A hot baking vessel and oven create powerful oven spring.
- Don’t slice too early: Cutting hot bread releases steam and dries out the crumb.
Variations You Can Try
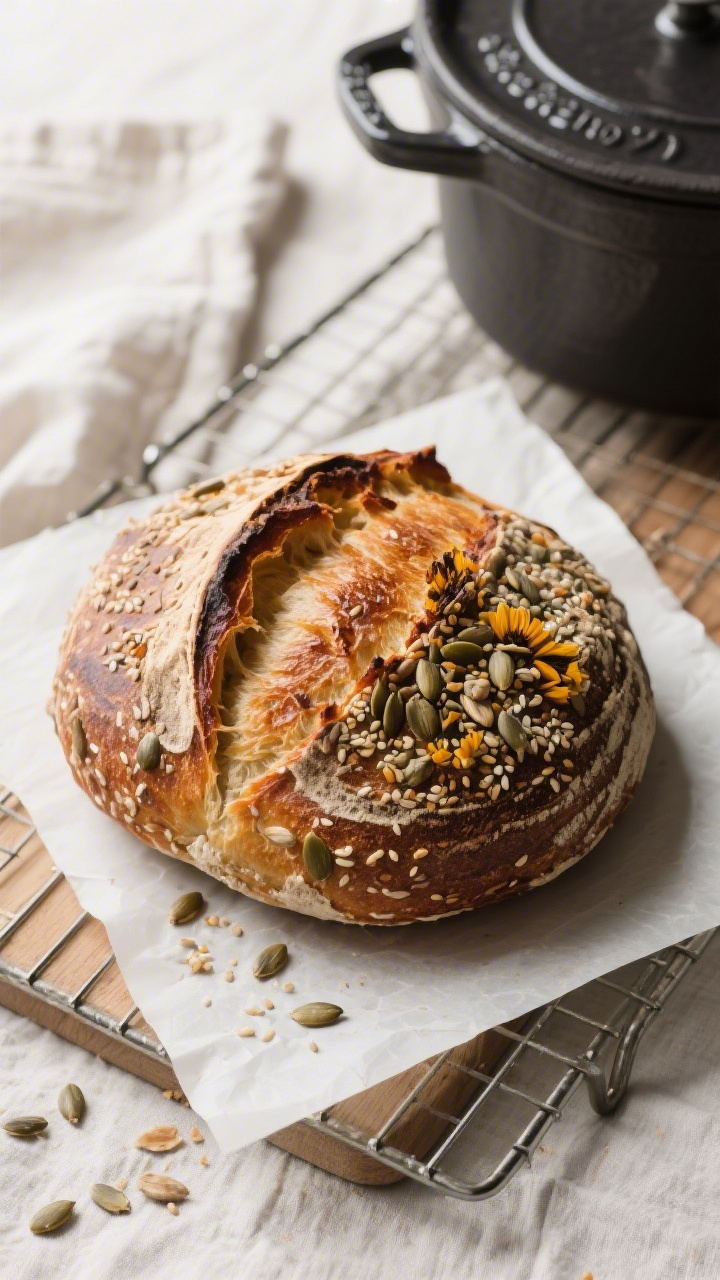
- Seeded sourdough: Add 50–80 g mixed seeds. For extra crunch, press some onto the surface before proofing.
- Whole wheat blend: Swap 100–150 g of bread flour with whole wheat.Add a touch more water if the dough feels stiff.
- Olive and herb: Gently fold in 80–100 g chopped olives and 1–2 teaspoons dried herbs during the last set of stretch-and-folds.
- Country loaf: Replace 50 g of water with 50 g milk or buttermilk for a tender crumb and subtle tang.
- Rye accent: Use 50–100 g rye flour for deeper flavor and a slightly tighter crumb.
- Overnight pan loaf: After shaping, place in a greased loaf pan, cold proof, then bake uncovered on a preheated sheet for easy slicing.
FAQ
How do I know my starter is ready to use?
A ready starter is bubbly, has risen to its peak within 4–8 hours of feeding, smells pleasantly tangy, and a small spoonful floats in water. If it sinks, feed and wait longer.
What if my dough is too sticky to handle?
Use slightly wet hands and a bench scraper instead of dumping in extra flour. Stickiness often improves after a few folds and a short rest as gluten develops.
Can I skip the Dutch oven?
Yes.
Bake on a preheated stone or sheet and create steam with a hot water tray for the first 15–20 minutes. Steam helps the loaf expand before the crust sets.
Why is my loaf dense?
Common reasons include an underactive starter, short fermentation, or adding too much flour. Make sure the dough shows clear signs of fermentation—puffiness and bubbles—before shaping.
How sour will this bread be?
Flavor depends on time and temperature.
Longer, cooler fermentation increases tang. Warmer, shorter fermentation gives a milder taste.
Can I use all-purpose flour?
You can. Expect a slightly softer dough and crumb.
If it feels loose, reduce water by 10–20 g or do an extra set of folds to strengthen it.
What’s the best way to score?
Use a very sharp blade and confident, shallow cuts about 1/2 inch deep. A single long slash works well for a nice ear and controlled expansion.
How do I maintain my starter?
Feed equal parts starter, flour, and water by weight daily if kept at room temp. For weekly baking, store it in the fridge and feed 1–2 times before baking to revive strength.
Can I add sweeteners?
Yes.
A tablespoon or two of honey or sugar adds subtle sweetness and color. Too much can speed fermentation, so watch proofing closely.
How long does the bread stay fresh?
At room temp, it’s best within 2–3 days. After that, toast revives it.
For longer storage, freeze slices and toast from frozen.
In Conclusion
Sourdough bread is all about rhythm: a healthy starter, patient fermentation, and confident shaping. With this base recipe, you’ll get a crisp crust, a tender crumb, and that unmistakable tang. Once you nail the process, play with flours, seeds, and proofing times to make it your own.
Keep it simple, trust the cues, and enjoy the loaf you’ve earned.
Printable Recipe Card
Want just the essential recipe details without scrolling through the article? Get our printable recipe card with just the ingredients and instructions.