
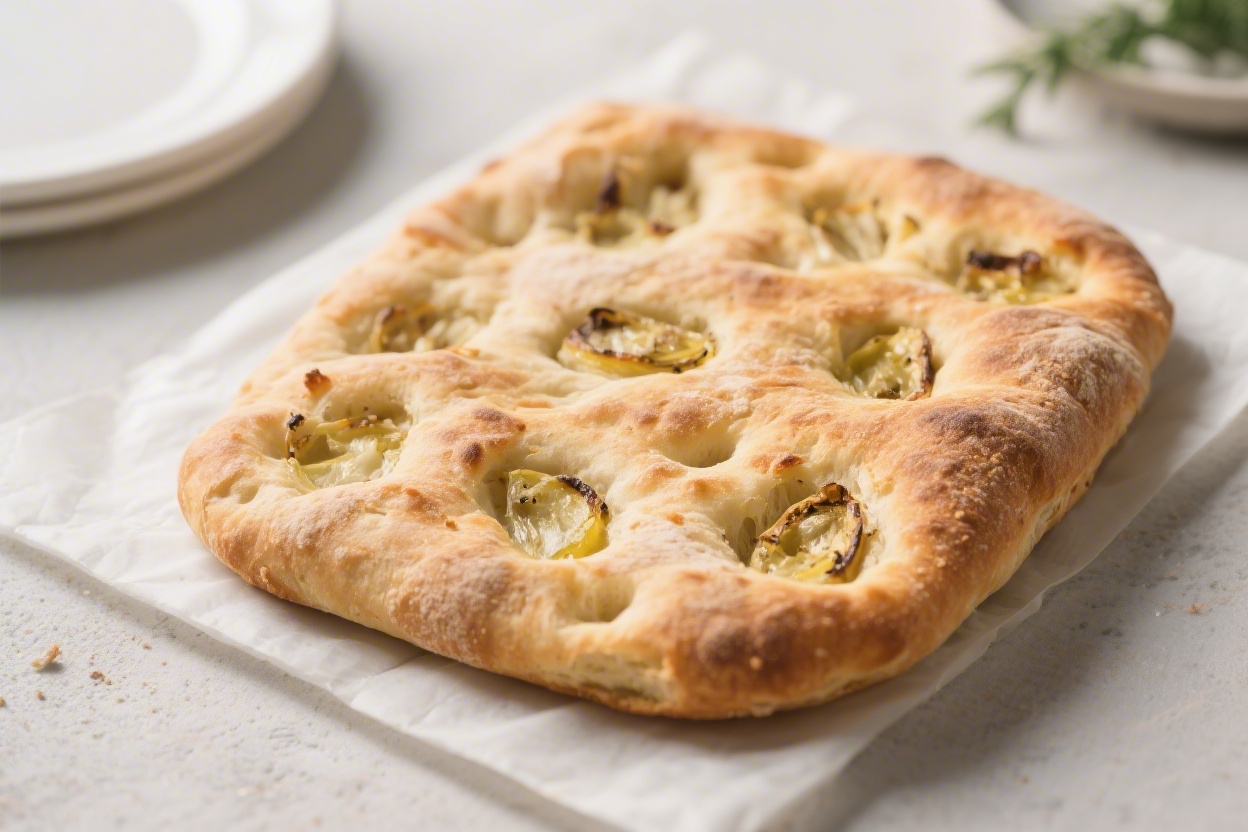
Sourdough focaccia brings together the best of two worlds: tangy flavor and a pillowy, olive oil–rich crumb. It’s the kind of bread that makes a simple meal feel special, whether you pair it with soup or slice it for sandwiches. The crust turns golden and crisp, while the inside stays airy and tender.
You don’t need fancy gear—just time, patience, and good olive oil. If you’re new to sourdough, this is a forgiving place to start.
What Makes This Special

This focaccia uses a natural sourdough starter, which means deeper flavor and better keeping quality than yeasted versions. Generous extra-virgin olive oil gives it a crisp bottom and a rich, fragrant taste.
A long, slow ferment makes the dough light and bubbly without much kneading. It’s also endlessly adaptable—top it with herbs, tomatoes, or olives, or keep it classic with flaky salt. Best of all, the hands-on time is minimal; the dough does most of the work while you go about your day.
Shopping List
- Active sourdough starter (100% hydration), 100 g
- Bread flour, 500 g (about 4 cups), or a mix of bread and all-purpose
- Water, 375–400 g (1.6 cups), room temperature
- Fine sea salt, 10 g (about 1 3/4 tsp)
- Extra-virgin olive oil, 60–80 ml (1/4–1/3 cup), plus extra for pan and finishing
- Flaky sea salt, for topping
- Optional toppings: fresh rosemary, thyme, cherry tomatoes, sliced red onion, olives, roasted garlic, lemon zest
Instructions

- Feed your starter. Make sure your starter is active and bubbly.Feed it 4–8 hours before mixing, depending on your room temperature. It should at least double in size and pass the float test.
- Mix the dough. In a large bowl, whisk together 375 g water and 100 g active starter until cloudy. Add 500 g flour and stir until no dry bits remain.The dough will be shaggy. Cover and rest for 30–45 minutes (autolyse).
- Add salt. Sprinkle 10 g fine sea salt over the dough and drizzle in 10 ml (about 2 tsp) olive oil. Use damp hands to pinch and fold the dough until the salt is incorporated.If the dough feels very stiff, add up to 25 g more water.
- Bulk fermentation with folds. Over the next 2–3 hours at warm room temperature (75–78°F/24–26°C), perform 3–4 sets of stretch-and-folds every 30 minutes. To do this, wet your hand, grab one side of the dough, stretch it up, and fold it over. Rotate the bowl and repeat 4 times per set.The dough should become smoother and more elastic.
- Let it rise. After the last fold, cover and let the dough rise until puffy and roughly doubled, 2–4 hours depending on temperature. You should see bubbles on the surface and around the edges. If your kitchen is cool, give it more time.
- Prepare the pan. Generously oil a metal 9×13-inch pan or a large sheet pan (about 2–3 tbsp oil).For an extra crisp bottom, add a touch more oil than you think you need. Gently pour the dough into the pan.
- First pan rest and stretch. Coat your hands with oil. Gently stretch the dough toward the corners without tearing.If it resists, let it rest 15 minutes and try again. You don’t need a perfect fit yet.
- Second rise (proof). Cover and let the dough proof in the pan for 1–2 hours at room temperature, or transfer to the fridge for a slow proof up to 12 hours. It should look full of tiny bubbles and jiggle when you shake the pan.
- Preheat and top. Preheat the oven to 450°F (232°C).Drizzle 2–3 tbsp olive oil over the dough. With oiled fingers, press straight down to create deep dimples all over. Sprinkle flaky sea salt and add your toppings (herbs, tomatoes, olives, etc.).
Press toppings lightly so they stick.
- Bake. Bake 20–25 minutes on the center rack until the top is golden and the edges are deeply browned. For extra color, bake an additional 3–5 minutes. The bottom should be crisp and well caramelized.
- Finish and cool. Remove from the pan onto a cooling rack.Brush or drizzle a final spoonful of olive oil over the surface. Cool at least 15–20 minutes before slicing to keep the crumb airy and moist.
How to Store
Keep leftovers wrapped in parchment or a breathable bag at room temperature for up to 2 days. Avoid sealing it airtight right away—it can make the crust soft.
For longer storage, freeze slices in a zip-top bag. Reheat in a 350°F (175°C) oven for 8–10 minutes or in a hot skillet with a light film of oil to revive the crisp edge.

Why This is Good for You
Sourdough fermentation can make bread easier to digest for some people. The long rise helps break down parts of the flour and can improve mineral availability.
Olive oil adds heart-friendly fats and helps you feel satisfied with smaller portions. Plus, you control the toppings—load on herbs, tomatoes, or onions for extra nutrients and flavor without heavy add-ons.
What Not to Do
- Don’t rush a sluggish starter. If it’s not bubbly and active, your focaccia will be dense and flat.
- Don’t skimp on oil in the pan. This bread needs oil for that signature crispy bottom and easy release.
- Don’t over-proof in a hot kitchen. If the dough triples and collapses, you’ll lose oven spring. Watch the dough, not the clock.
- Don’t overload watery toppings. Too many juicy tomatoes or wet onions can make the center gummy.Pat them dry or roast first.
- Don’t cut immediately. Let it cool briefly to set the crumb; slicing too soon compresses the structure.
Alternatives
- Flour swap: Use up to 20–30% whole wheat for a nuttier flavor. Add a splash more water if needed.
- Herb variations: Try rosemary and lemon zest, thyme and black pepper, or za’atar and sesame.
- Veggie toppings: Cherry tomatoes, thin-sliced potatoes (parboil first), caramelized onions, or roasted peppers.
- Olive lovers: Use a mix of green and black olives, pressed into the dough with capers and a dusting of oregano.
- Garlic infusion: Warm olive oil with smashed garlic and a sprig of rosemary; cool and use it for the dimple step.
- Pan choice: For a thicker focaccia, use a 9×13 pan. For a thinner, crisper style, spread on a half-sheet pan.
FAQ
Can I make this without a sourdough starter?
Yes.
Use 2 tsp instant yeast and increase the water slightly if needed. Skip the long ferment and let the dough double once before moving to the pan. The flavor will be milder, but still delicious.
My dough is super sticky.
Is that normal?
Yes. Focaccia dough is high-hydration and should feel wet and loose. Use oiled or damp hands and a bench scraper.
Resist adding lots of flour—it will make the bread dense.
How do I know the dough has proofed enough in the pan?
It should be puffy, jiggly, and full of tiny bubbles. A gentle poke should slowly spring back but still leave a slight dent. Under-proofed dough looks tight; over-proofed dough can deflate easily.
What if I don’t have bread flour?
All-purpose flour works.
Expect a slightly softer structure and maybe a bit less oven spring. If your AP flour is lower protein, reduce water by 15–20 g to keep the dough manageable.
Can I cold-proof overnight?
Absolutely. After transferring to the pan and the first gentle stretch, cover and refrigerate 8–12 hours.
Let it warm up for 30–60 minutes, dimple, top, and bake.
Why is the bottom not crisp?
Usually it’s a pan or oil issue. Use a well-oiled metal pan, not glass or ceramic, and give the focaccia a few extra minutes to deeply brown. You can also finish it on the bottom rack for the last 3–5 minutes.
How do I keep the crust crisp after baking?
Cool on a wire rack so steam can escape.
Store in a paper bag or wrapped in a tea towel. Re-crisp in a hot oven or skillet before serving.
Can I add cheese?
Yes, but use restraint. Scatter a modest amount of grated Parmesan or small cubes of mozzarella during the last 5–7 minutes of baking to avoid greasy spots.
Final Thoughts
Sourdough focaccia rewards patience with big flavor and a texture you’ll crave: crisp edges, airy crumb, and a lush olive oil finish.
Once you’ve made it once, it becomes a flexible canvas for whatever herbs and toppings you love. Keep an eye on your starter, trust the dough’s cues, and let time do the heavy lifting. With a few simple steps, you’ll have a bakery-worthy pan of bread at home—ready to share, or not.
