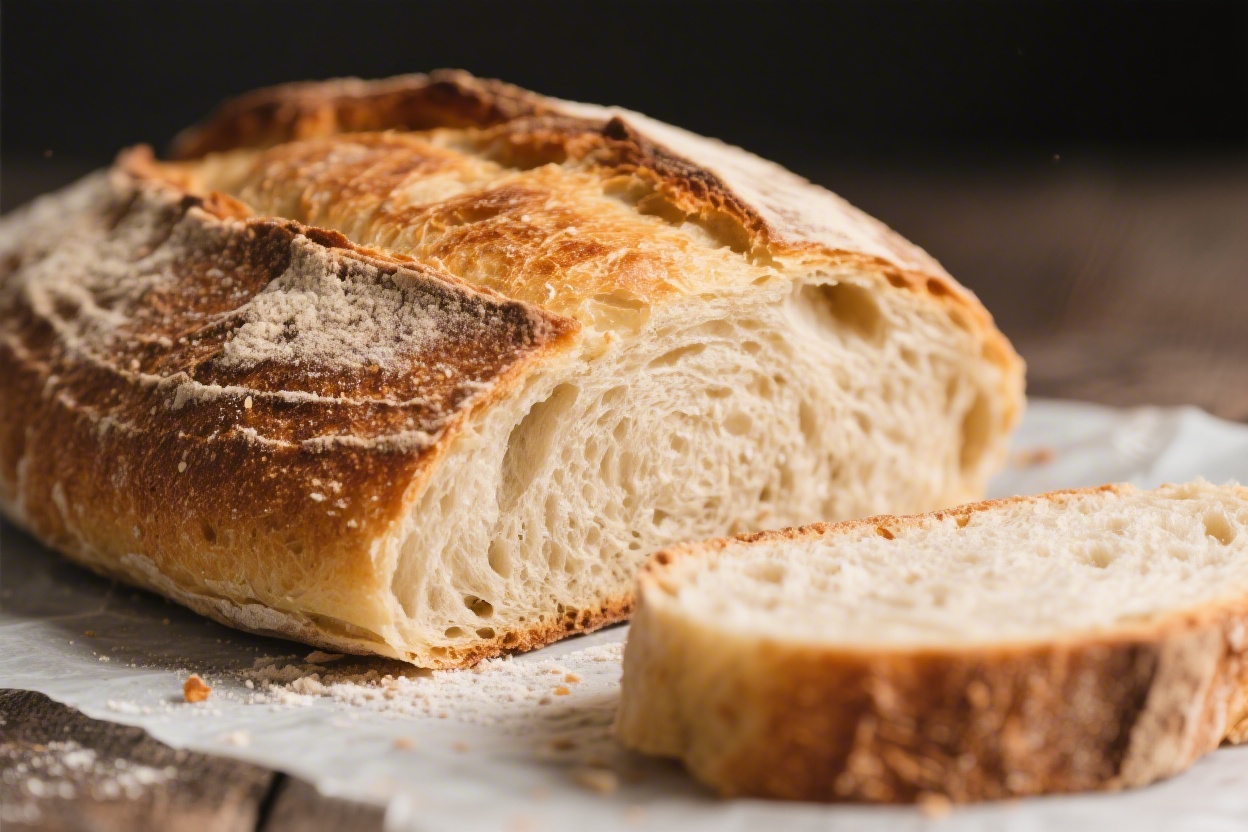
Sweet sourdough hits a special spot: a little tang, a gentle sweetness, and a tender crumb that’s great for breakfast, snacking, or French toast. If you love classic sourdough but want a softer, slightly richer loaf, this recipe strikes the right balance. It uses an active starter, a touch of sugar and honey, and a bit of butter for a soft texture.
The crust is golden and crisp, but not tough. Slice it thick, toast it lightly, and it’s a simple pleasure any day of the week.
What Makes This Recipe So Good

- Balanced flavor: Mild tang from the starter, rounded out with honey and sugar for a subtle sweetness.
- Soft, tender crumb: A little butter and milk create a pillowy interior that’s still sturdy enough for sandwiches.
- Flexible timeline: You can do a same-day bake or chill the shaped loaf overnight for a deeper flavor.
- Beginner-friendly method: Straightforward steps with cues for texture, rise, and doneness.
- Versatile: Great plain, with cinnamon butter, or as the base for the best French toast you’ll make at home.
Ingredients
- 150 g active sourdough starter (100% hydration, bubbly and doubling within 6–8 hours)
- 300 g warm milk (or water), about 80–90°F
- 60 g honey (or maple syrup)
- 40 g granulated sugar (or light brown sugar)
- 500 g bread flour (or 450 g bread flour + 50 g whole wheat flour)
- 8 g fine sea salt
- 50 g unsalted butter, softened
- 1 tsp vanilla extract (optional, for a gentle bakery-style aroma)
- Neutral oil or soft butter for greasing the bowl
- 1 egg + 1 tbsp milk for egg wash (optional, for shine)
- Coarse sugar or pearl sugar (optional topping)
Instructions

- Feed your starter: Make sure your starter is active and bubbly. It should pass the float test and show plenty of air pockets.Plan to use it at peak.
- Mix the wet ingredients: In a large bowl, whisk the warm milk, honey, sugar, vanilla (if using), and starter until mostly smooth.
- Add flour and salt: Stir in the flour and salt until no dry bits remain. The dough will look shaggy and sticky at this stage.
- Rest (autolyse): Let the dough rest, covered, for 20–30 minutes. This makes it easier to handle and improves gluten development.
- Knead in the butter: Add the softened butter and work it into the dough by pinching and folding.Then knead for 5–8 minutes until smooth and slightly tacky. You can use a stand mixer with a dough hook on low-medium for 5–6 minutes.
- First rise (bulk fermentation): Transfer the dough to a lightly oiled bowl, cover, and let it rise at warm room temperature (75–78°F) until puffy and roughly doubled, about 3–4 hours. Perform 2–3 sets of stretch-and-folds during the first 90 minutes, every 30 minutes, to build structure.
- Check readiness: The dough should feel airy, jiggle slightly, and show bubbles along the sides of the bowl.If it feels dense, give it another 30–60 minutes.
- Shape the loaf: Turn the dough onto a lightly floured surface. Gently press into a rectangle, then roll it up like a jelly roll, tucking the sides slightly for tension. Place seam-side down in a greased 9×5-inch loaf pan or a parchment-lined pan.
- Final proof: Cover and proof until the dough rises about 1 inch over the rim of the pan and springs back slowly when gently pressed, 1.5–3 hours depending on temperature.For deeper flavor and a flexible schedule, refrigerate overnight after partially proofing for 30–45 minutes at room temperature. Bake directly from the fridge the next day.
- Preheat and glaze: Preheat the oven to 375°F (190°C). Brush the top with egg wash for shine.Sprinkle with coarse sugar if you’d like a bakery-style finish.
- Bake: Bake for 30–38 minutes, until the top is deep golden and the internal temperature reads 195–200°F. If the top browns too quickly, tent loosely with foil for the last 10 minutes.
- Cool completely: Remove from the pan after 10 minutes and cool on a rack for at least 1 hour before slicing. This sets the crumb so it stays soft and not gummy.
Keeping It Fresh
- Room temperature: Store the cooled loaf in a bread bag or wrapped in a clean towel for 2–3 days.Avoid the fridge; it dries bread out quickly.
- Freezing: Slice, wrap tightly, and freeze for up to 2 months. Toast slices straight from the freezer.
- Reviving: If the crust softens, refresh slices in a 350°F oven for 5–7 minutes or give them a quick toast.

Why This is Good for You
- Gentler on digestion: Natural fermentation can help break down some starches and gluten, making the bread easier to digest for many people.
- Better flavor, fewer additives: You get deep, complex taste without conditioners or artificial sweeteners.
- Balanced energy: The combination of sourdough fermentation and a bit of whole wheat (if used) can lead to steadier energy compared to ultra-refined, fast-rise loaves.
Pitfalls to Watch Out For
- Underactive starter: If your starter isn’t at its peak, the loaf will rise slowly and can end up dense. Make sure it doubles reliably before baking day.
- Too warm or too cold: Temperature drives fermentation.If your kitchen is cool, expect longer rise times. If hot, keep an eye out to avoid overproofing.
- Adding too much flour: The dough should be slightly tacky. Heavy-handed flouring leads to a dry loaf.Oil your hands instead of dusting a lot of flour.
- Slicing too soon: Cutting hot bread compresses the crumb and makes it gummy. Let it cool fully for the best texture.
Alternatives
- Cinnamon swirl: After the first rise, roll the dough into a rectangle. Brush with a little melted butter and sprinkle with 50 g sugar + 2 tsp cinnamon.Roll up and proof as directed.
- Chocolate chip: Gently knead 120 g chocolate chips into the dough right after autolyse. Reduce added sugar by 10–15 g if you like it less sweet.
- Raisin honey: Soak 120 g raisins in warm water for 10 minutes, drain well, and fold in after the first set of stretch-and-folds.
- Dairy-free: Use warm water or almond milk and swap butter for 45 g neutral oil or coconut oil. Expect a slightly different crumb but still soft.
- Whole wheat boost: Use 30–40% whole wheat flour and add 10–15 g extra milk if the dough feels stiff.
FAQ
Can I use discard instead of active starter?
You’ll get the best rise and texture with an active, bubbly starter.
Discard won’t provide enough leavening on its own. If you want to use discard for flavor, replace up to 50 g of the flour and liquid with discard, but keep the main 150 g of starter active.
How do I know the dough is proofed enough to bake?
Use the poke test: press a floured finger gently into the dough. If it springs back slowly and leaves a slight dent, you’re ready.
If it snaps back quickly, let it go longer. If it collapses and doesn’t spring at all, it may be overproofed.
What if I don’t have a loaf pan?
Shape into a tight bâtard or boule and proof in a floured banneton or a bowl lined with a floured towel. Bake on a preheated sheet or stone at 400°F for 30–40 minutes.
Steam the oven in the first 10 minutes with a tray of hot water for a good crust.
Can I reduce the sugar?
Yes. The honey and sugar add tenderness and a gentle sweetness, but you can cut either by 25–30% without major issues. Keep at least a small amount of sugar or honey for browning and moisture.
Why is my loaf pale?
It may need a few more minutes in the oven, or your oven runs cool.
Make sure there’s some sugar or honey in the dough for caramelization, and use egg wash for extra shine and color.
Can I make this gluten-free?
Gluten-free sourdough requires a different flour blend and hydration. This recipe won’t translate 1:1. Look for a tested gluten-free sourdough sandwich loaf recipe and adapt the sweeteners and fat from here.
How do I schedule this for a workday?
Mix and do the first rise in the evening, shape, then refrigerate overnight.
Bake straight from the fridge in the morning or after work. Cold dough scores and handles well and develops great flavor.
Final Thoughts
A sweet sourdough loaf brings comfort without being heavy or cloying. With a lively starter and a few simple steps, you get a soft, fragrant bread that suits breakfast as much as dessert.
Keep your rises gentle, your dough slightly tacky, and your patience steady. The result is a golden, tender slice that feels special any day of the week.
Printable Recipe Card
Want just the essential recipe details without scrolling through the article? Get our printable recipe card with just the ingredients and instructions.