
If you love the smell of warm cinnamon rolls but don’t want to make dough from scratch, this hack is your new best friend. Using Rhodes frozen cinnamon rolls, a few pantry upgrades, and some simple timing tricks, you can get soft, gooey, bakery-style results at home. No kneading.
No complicated steps. Just a smarter way to bake what you already love. The best part?
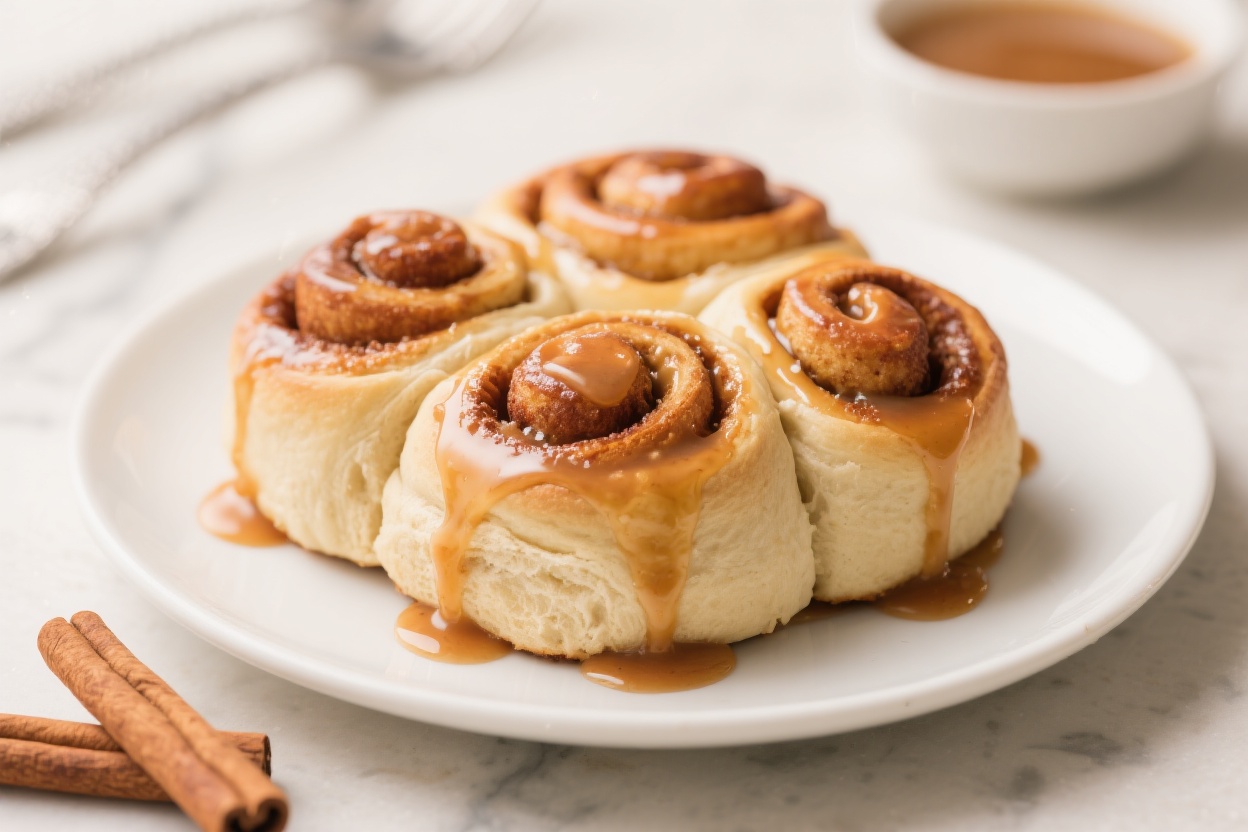
These rolls turn out plush in the center, caramelized at the edges, and generously iced—every single time.
What Makes This Special
This hack focuses on texture and moisture so the rolls bake up pillowy-soft and gooey instead of dry or bready. A simple cream soak keeps the centers tender and gooey. A butter-cinnamon boost adds richness and depth to the filling.
And a few tweaks in proofing and baking help the rolls rise tall and bake evenly, without drying out.
It’s still fast and easy, but the results taste like you made them from scratch. If you’ve tried the TikTok “heavy cream rolls,” this version refines the method for consistent results—no soggy bottoms, no burnt tops.
Ingredients
- 12 Rhodes frozen cinnamon rolls (unbaked, with icing packets included)
- 3 tablespoons unsalted butter, very soft (plus more for greasing)
- 2 tablespoons brown sugar (light or dark)
- 1 teaspoon ground cinnamon (add 1/4 teaspoon more if you like extra spice)
- 1/2 cup heavy cream (room temperature; see Alternatives for swaps)
- 1 teaspoon vanilla extract (optional, for the cream)
- 1/8 teaspoon fine salt (to balance sweetness)
- Icing from the Rhodes package (or see Alternatives for homemade cream cheese icing)
Step-by-Step Instructions
- Prep the pan. Lightly grease a 9×13-inch baking dish with butter. This helps the edges caramelize without sticking and makes cleanup easier.
- Arrange the rolls. Place the frozen rolls in the dish, evenly spaced.Leave a little room between each to allow for rising.
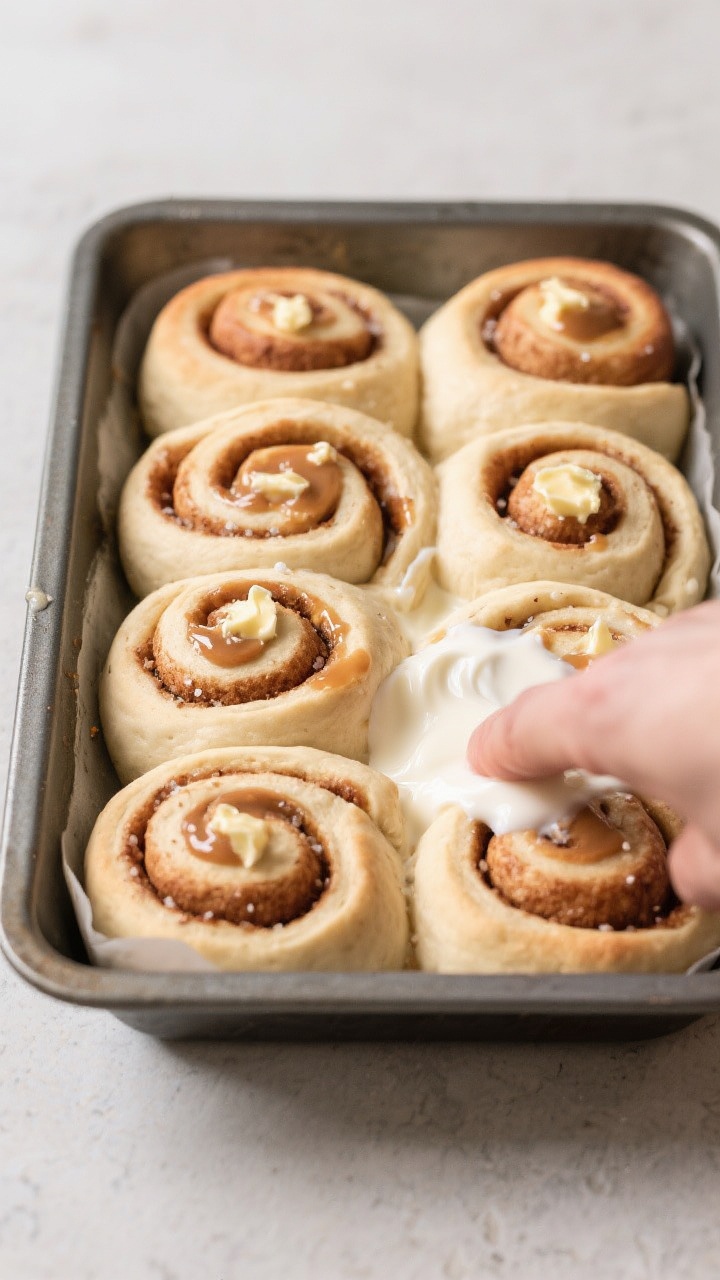
- Make the butter-cinnamon boost. In a small bowl, mix the soft butter, brown sugar, cinnamon, and salt into a paste. Dot or smear a little onto the tops and sides of each roll. This melts down and enriches the filling as they bake.
- Proof the rolls. Cover the pan loosely with greased plastic wrap.Let the rolls rise in a warm spot until puffy and nearly doubled, 2.5–4 hours depending on your kitchen temperature. They should look soft and expanded, not tight or still frozen in the middle.
- Preheat the oven. When the rolls are almost ready, preheat to 350°F (175°C). Position a rack in the center of the oven.
- Add the cream. Stir the heavy cream with the vanilla.Gently pour it around the rolls, letting it pool in the bottom of the dish. Avoid dousing the tops completely; focus on the spaces between. The cream will steam and soak the bottoms, making them gooey without getting soggy.
- Bake. Bake uncovered for 20–25 minutes until the tops are light golden and the centers are set but still soft.If the tops brown too fast, tent loosely with foil for the last 5–7 minutes.
- Check doneness. The best sign is a slight jiggle with fully puffed centers. If a center looks doughy, bake 3–5 minutes more. Don’t overbake—soft and gooey is the goal.
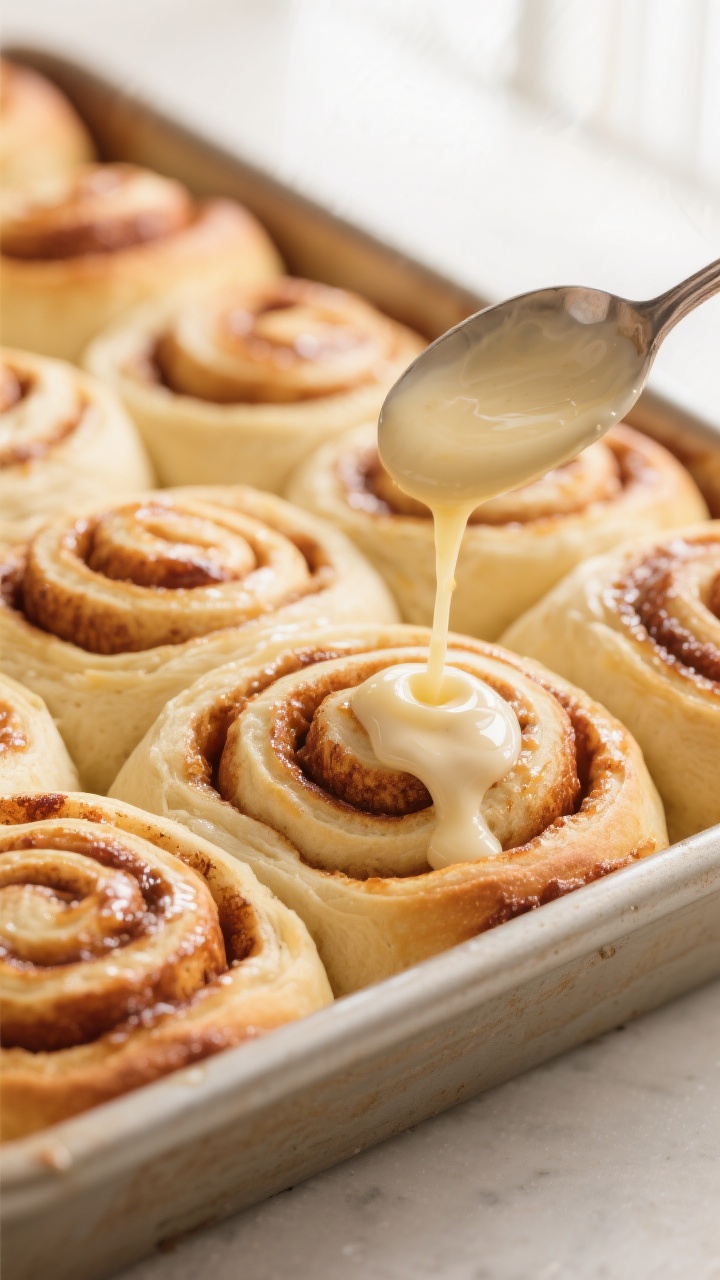
- Warm the icing. While the rolls finish baking, place the icing packets in a bowl of warm water to loosen them.This makes spreading easier and helps the icing melt into all the crevices.
- Rest briefly, then ice. Let the rolls cool for 5 minutes so the icing doesn’t slip off completely. Spread icing generously over the warm rolls so it seeps down the sides.
- Serve. Spoon some of the buttery cream sauce from the pan over each roll for extra gooeyness. Serve warm.
Storage Instructions
- Room temperature: Keep covered for up to 1 day.Rewarm in the microwave for 10–15 seconds per roll.
- Refrigerator: Store in an airtight container for 3–4 days. Reheat covered in a 300°F oven for 8–10 minutes or microwave briefly.
- Freezer: Freeze baked and cooled rolls without icing for up to 2 months. Thaw overnight in the fridge, warm in a 325°F oven for 10–12 minutes, then ice.
- Make-ahead option: Arrange and proof the night before in the fridge (covered).In the morning, let sit at room temp 30–45 minutes, add the cream, then bake.
Health Benefits
These are a treat, but a few choices can make them a touch friendlier. Cinnamon provides antioxidants and may help support healthy blood sugar response when enjoyed as part of a balanced meal. Using a small amount of salt heightens flavor, which can help you feel satisfied with a smaller portion.
If you’re looking to lighten things up, see the Alternatives for lower-sugar icing and dairy swaps.
Pairing a roll with protein (like eggs or Greek yogurt) can help steady energy and keep you full longer.
Common Mistakes to Avoid
- Rushing the rise: Under-proofed rolls bake dense in the center. Wait until they look puffy and nearly doubled.
- Cold cream: Pouring fridge-cold cream into a hot oven can slow baking and cause uneven doneness. Use room-temperature cream.
- Too much cream on top: Flooding the tops can wash off the cinnamon.Pour around the rolls and in between, not directly over each top.
- Overbaking: Dry rolls happen fast. Pull them when light golden and just set in the center.
- Skipping the rest before icing: Without a brief 5-minute rest, the icing melts off instead of hugging the swirls.
Alternatives
- Dairy swaps: Use half-and-half for a lighter version, or full-fat oat creamer for a dairy-free option with similar richness. Coconut cream works too, though it adds coconut flavor.
- Extra-gooey sauce: Whisk 2 tablespoons sweetened condensed milk into the cream for a richer caramel vibe.
- Homemade cream cheese icing: Beat 4 ounces softened cream cheese, 2 tablespoons butter, 1 cup powdered sugar, 1 teaspoon vanilla, and a pinch of salt.Thin with a tablespoon of warm milk if needed.
- Bourbon-maple finish: Stir 1 tablespoon maple syrup and 1 teaspoon bourbon into the icing for a cozy weekend twist.
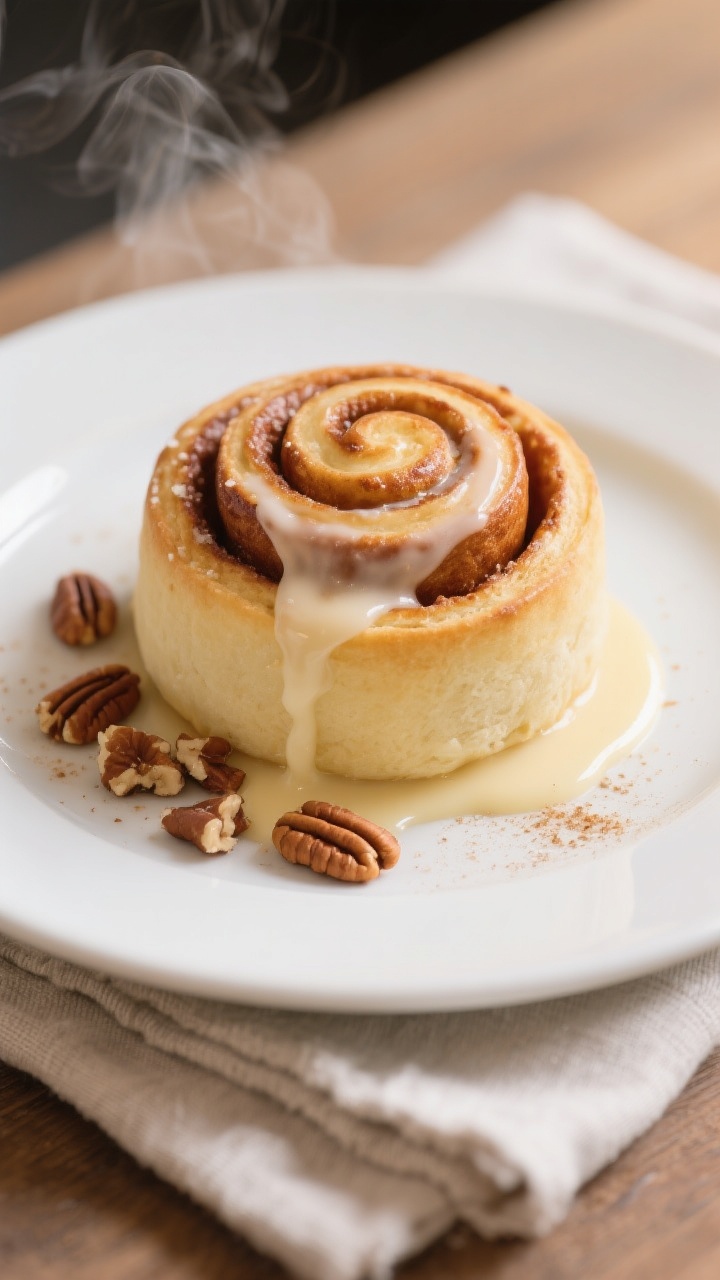
- Nutty crunch: Sprinkle 1/2 cup chopped pecans or walnuts over the rolls before baking for texture.
- Spice blends: Add a pinch of cardamom or nutmeg to the cinnamon mixture for a bakery-style depth.
- Mini rolls: Use a square pan and place rolls closer together for taller, pull-apart minis. Start checking 5 minutes earlier.
- Lower sugar: Halve the icing or make a light drizzle with powdered sugar, milk, and vanilla. You still get that glossy finish without the full sweetness.
FAQ
Do I have to thaw the rolls first?
Yes, they need time to proof so they bake light and fluffy.
Thaw and rise until puffy before baking; baking from frozen leads to uneven, doughy centers.
Can I use Rhodes dinner rolls with a homemade filling?
You can. Roll thawed dinner rolls into a rectangle, spread with butter, brown sugar, and cinnamon, then slice and proof. The flavor is great, though the texture is slightly different than the cinnamon roll version.
What if my kitchen is cold and the rolls won’t rise?
Place the covered pan in an unheated oven with a bowl of hot water on the rack below.
Refresh the hot water as needed. This creates a gentle, warm environment for proofing.
Why are my rolls brown on top but raw in the middle?
They likely rose unevenly or the oven ran hot. Tent with foil for the last part of baking and make sure the cream is room temperature.
Also, check your oven with an oven thermometer.
How do I keep the bottoms from getting soggy?
Don’t pour cream directly on top of each roll; pour it into the gaps around them. Bake on the center rack, and avoid overcrowding the pan so moisture can evaporate evenly.
Can I make them the night before?
Yes. Arrange and proof in the fridge overnight, loosely covered.
In the morning, let sit at room temp 30–45 minutes, add the cream, and bake.
What’s the best way to reheat without drying them out?
Cover the rolls with foil and warm in a 300°F oven for 8–10 minutes, or microwave each roll for 10–15 seconds. A tiny splash of milk in the dish before reheating can refresh moisture.
Can I double the recipe for a crowd?
Absolutely. Use two 9×13-inch pans and rotate them halfway through baking for even color.
Keep an eye on doneness, as crowded ovens can alter bake times.
In Conclusion
This Rhodes cinnamon rolls hack gives you everything you want—soft centers, gooey swirls, and rich icing—without the fuss of homemade dough. A little cream, a buttery cinnamon boost, and patient proofing turn a freezer shortcut into a bakery-level treat. Keep this one in your back pocket for holidays, brunches, or any Saturday morning that needs something warm and sweet.
Simple steps, big payoff, and happy faces around the table.
Printable Recipe Card
Want just the essential recipe details without scrolling through the article? Get our printable recipe card with just the ingredients and instructions.